

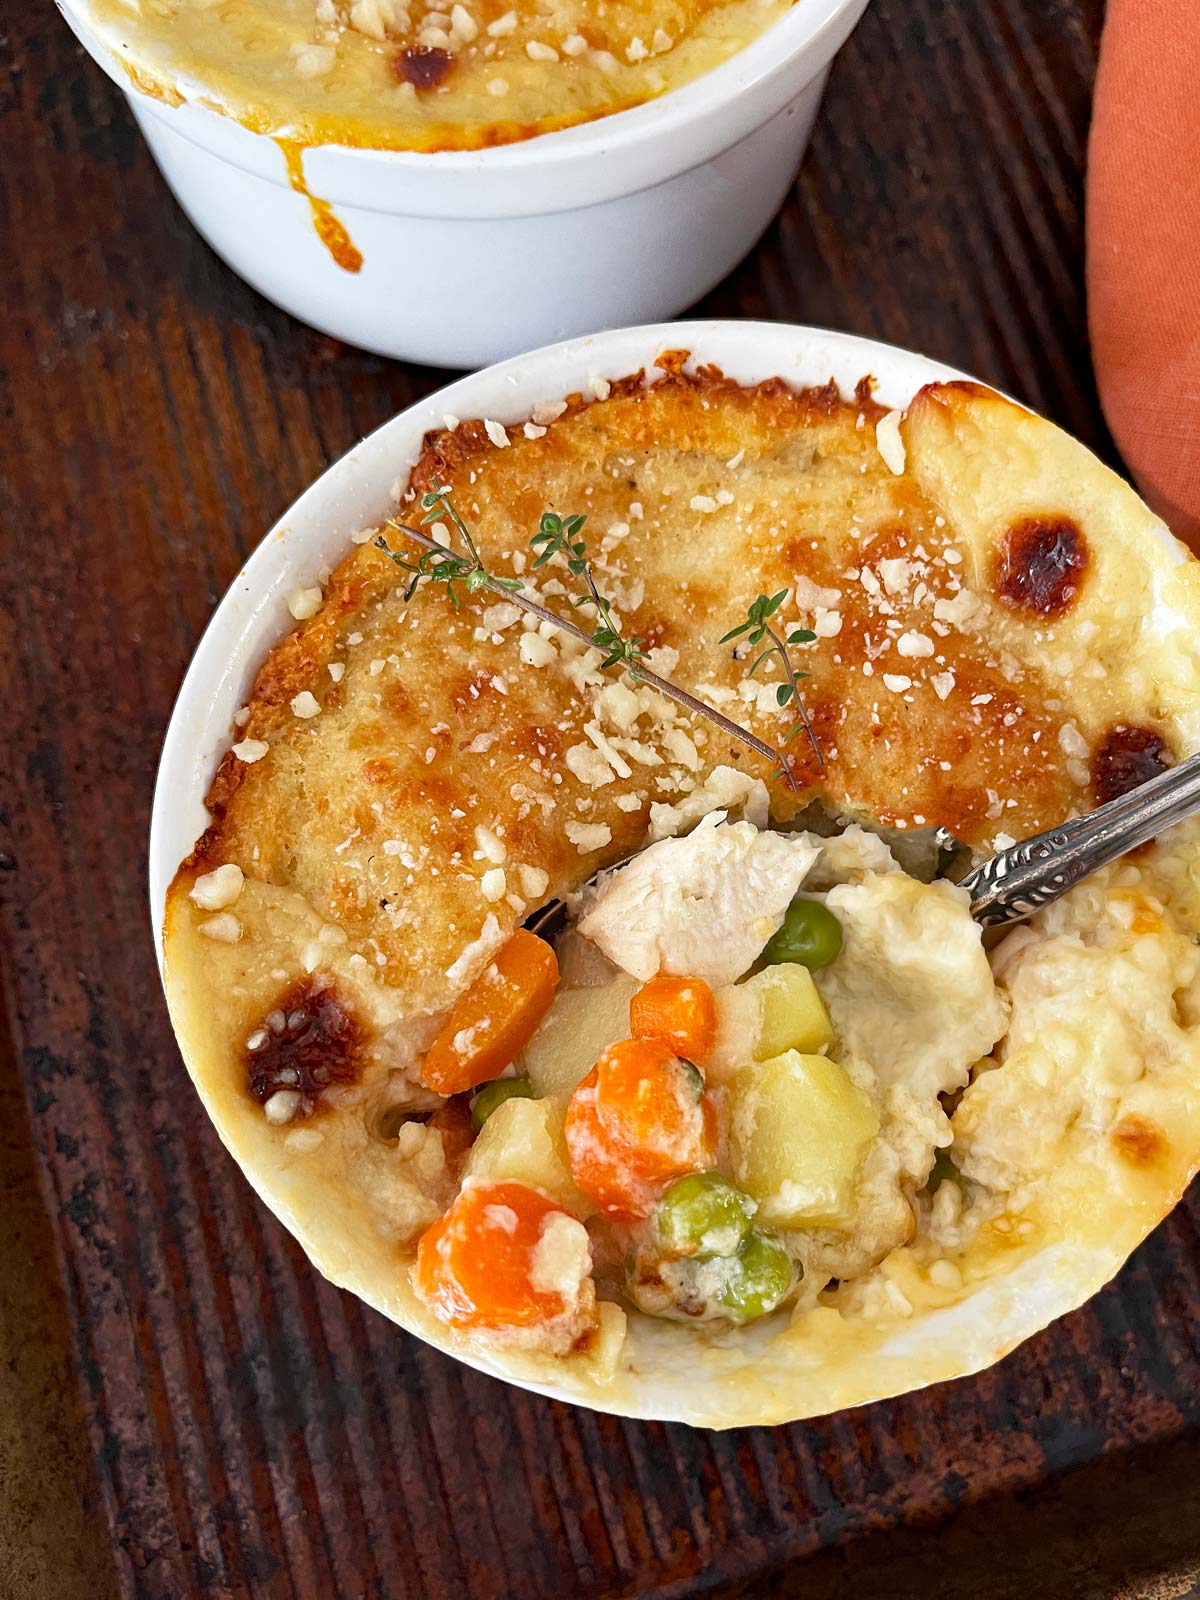
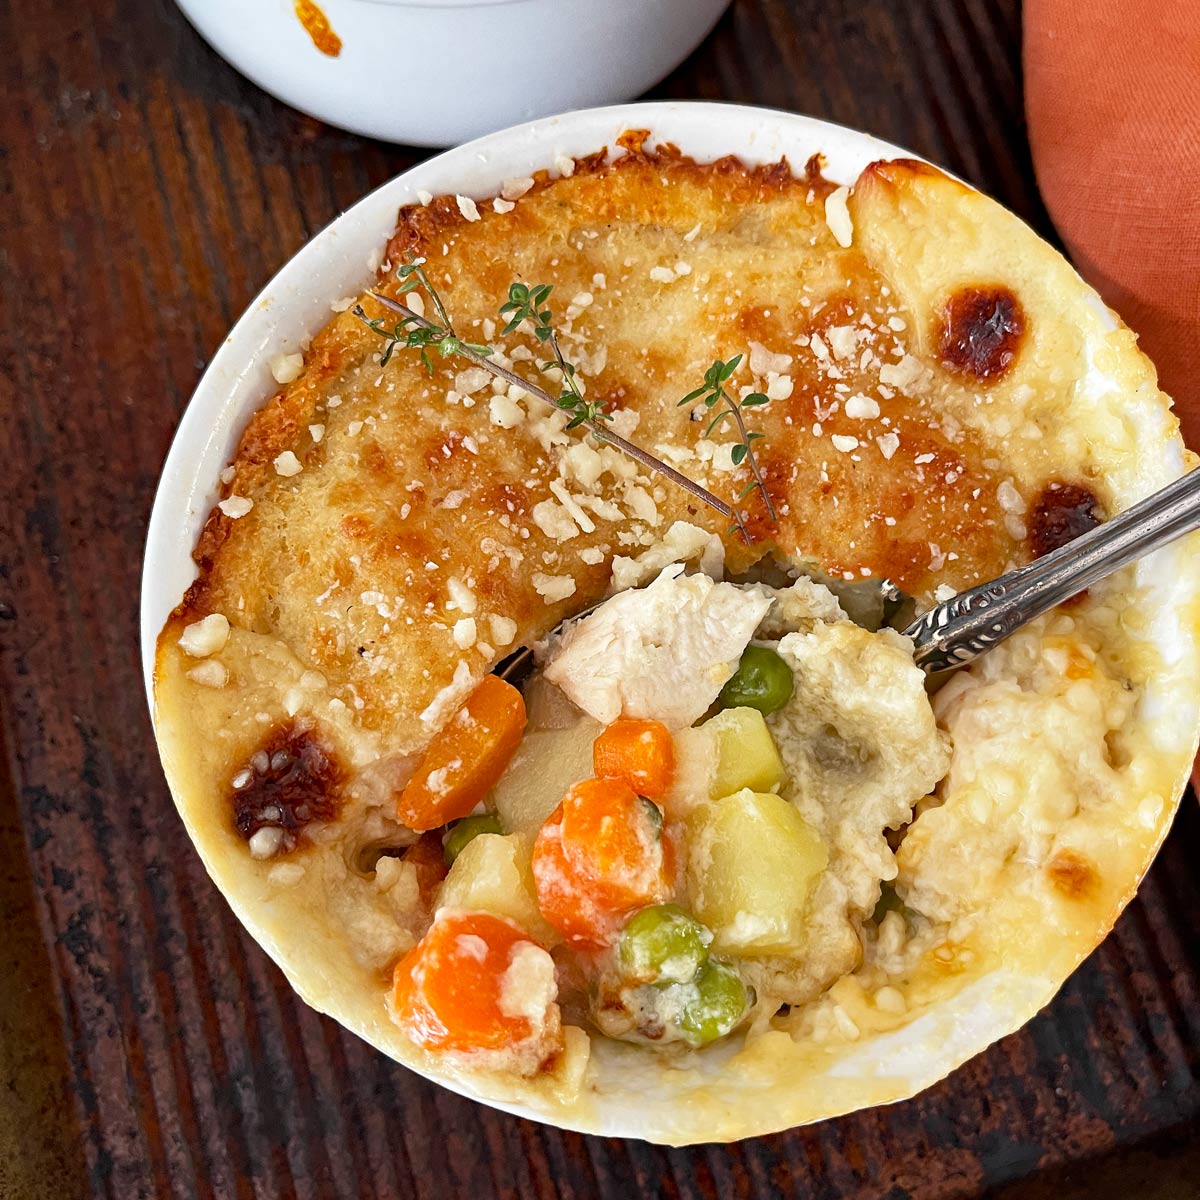
Chicken Pot Pie with Cauliflower Crust is an on-trend remake of a comfort food classic. Riced cauliflower makes a carb-smart substitution for much of the flour in the crust. Healthline has all you need to know about why cauliflower is so good for you!
Jump to:
Ingredients
For the full recipe with quantities, see the recipe card at the end of the post.
INGREDIENT NOTES
- Olive oil spray - If you don't have this just grease the ramekins with a little olive oil.
- Cauliflower "rice" - You can make your own by chopping fresh cauliflower into tiny pieces in a food processor. You can also buy it already "riced" in the produce department or the frozen vegetable section of the grocery store.
- Parmesan cheese - grated works best.
- Egg - use the whites or the yolk as you like. I use the egg white because it makes a crust whose color most resembles a regular flour crust. Don't use a whole egg unless you are doubling the recipe.
- Yukon Gold potatoes - really any potato will do. These are just my favorites because they hold together better.
- Garlic - finely minced garlic or frozen grated garlic from the frozen food aisle.
- Low-fat milk - the assumption here is that you are making cauliflower crust to cut fat and/or calories. If not, feel free to use whole milk.
- Low sodium chicken broth - If using regular chicken broth cut the salt in the recipe in half.
- Thyme - use fresh or dried thyme. Reduce the amount of dried thyme by half the fresh amount.
- Cooked, diced chicken breast. You can use rotisserie chicken or cook your own. Do not add raw chicken to the pot pie!
STEP-BY-STEP INSTRUCTIONS
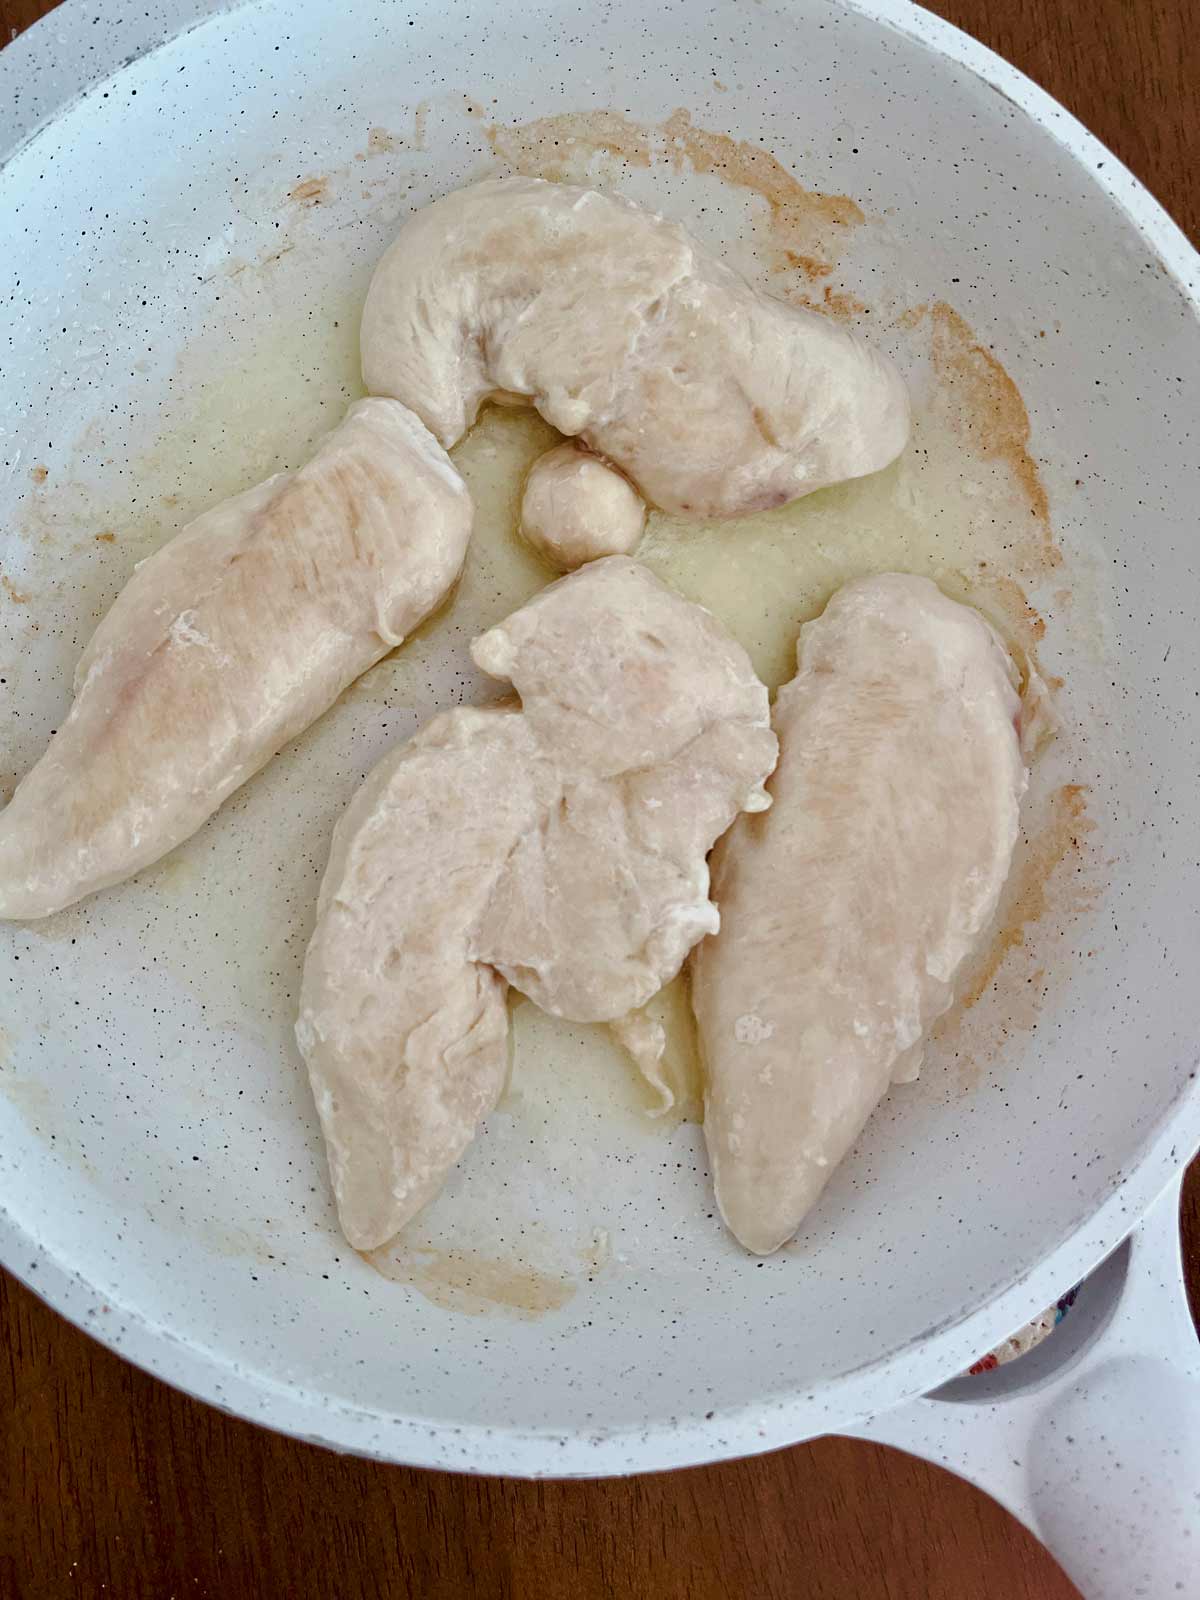
Cook chicken breast and cube. If using rotisserie chicken dice it into cubes.
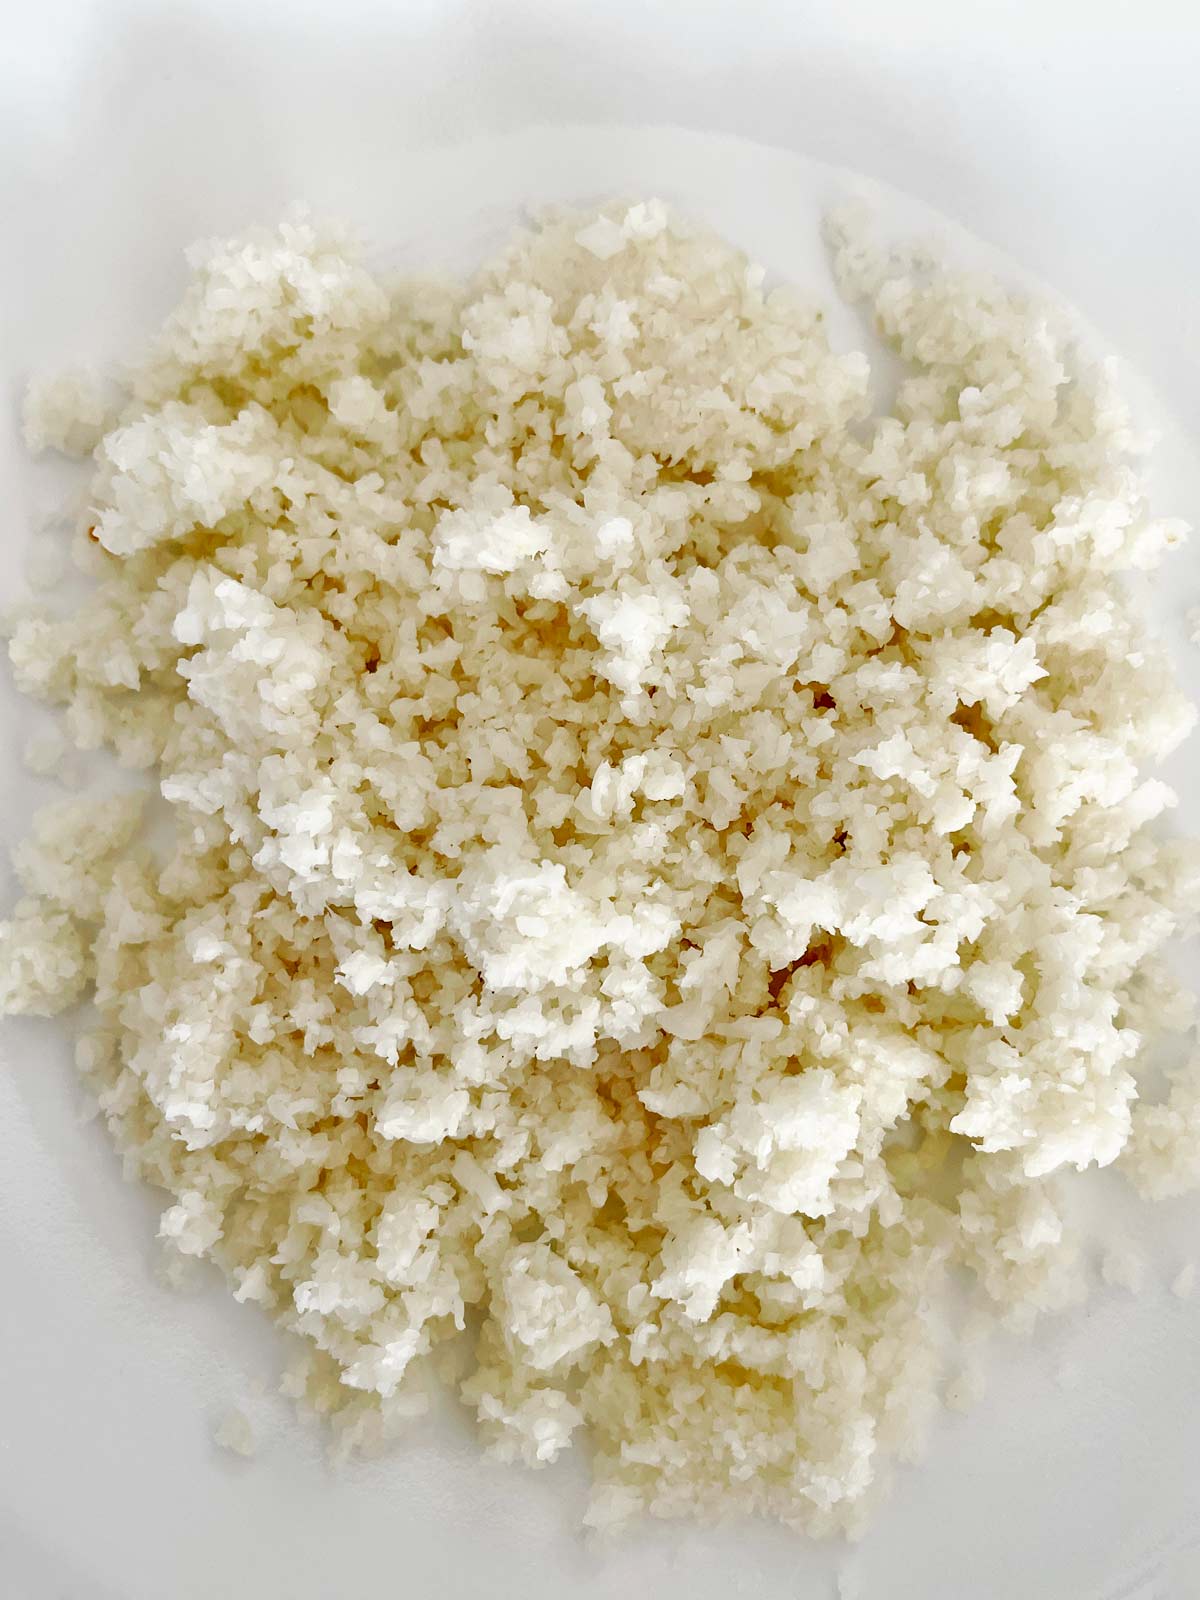
Cook the cauliflower, in the microwave or steamer until soft, 3-5 minutes. Cool.
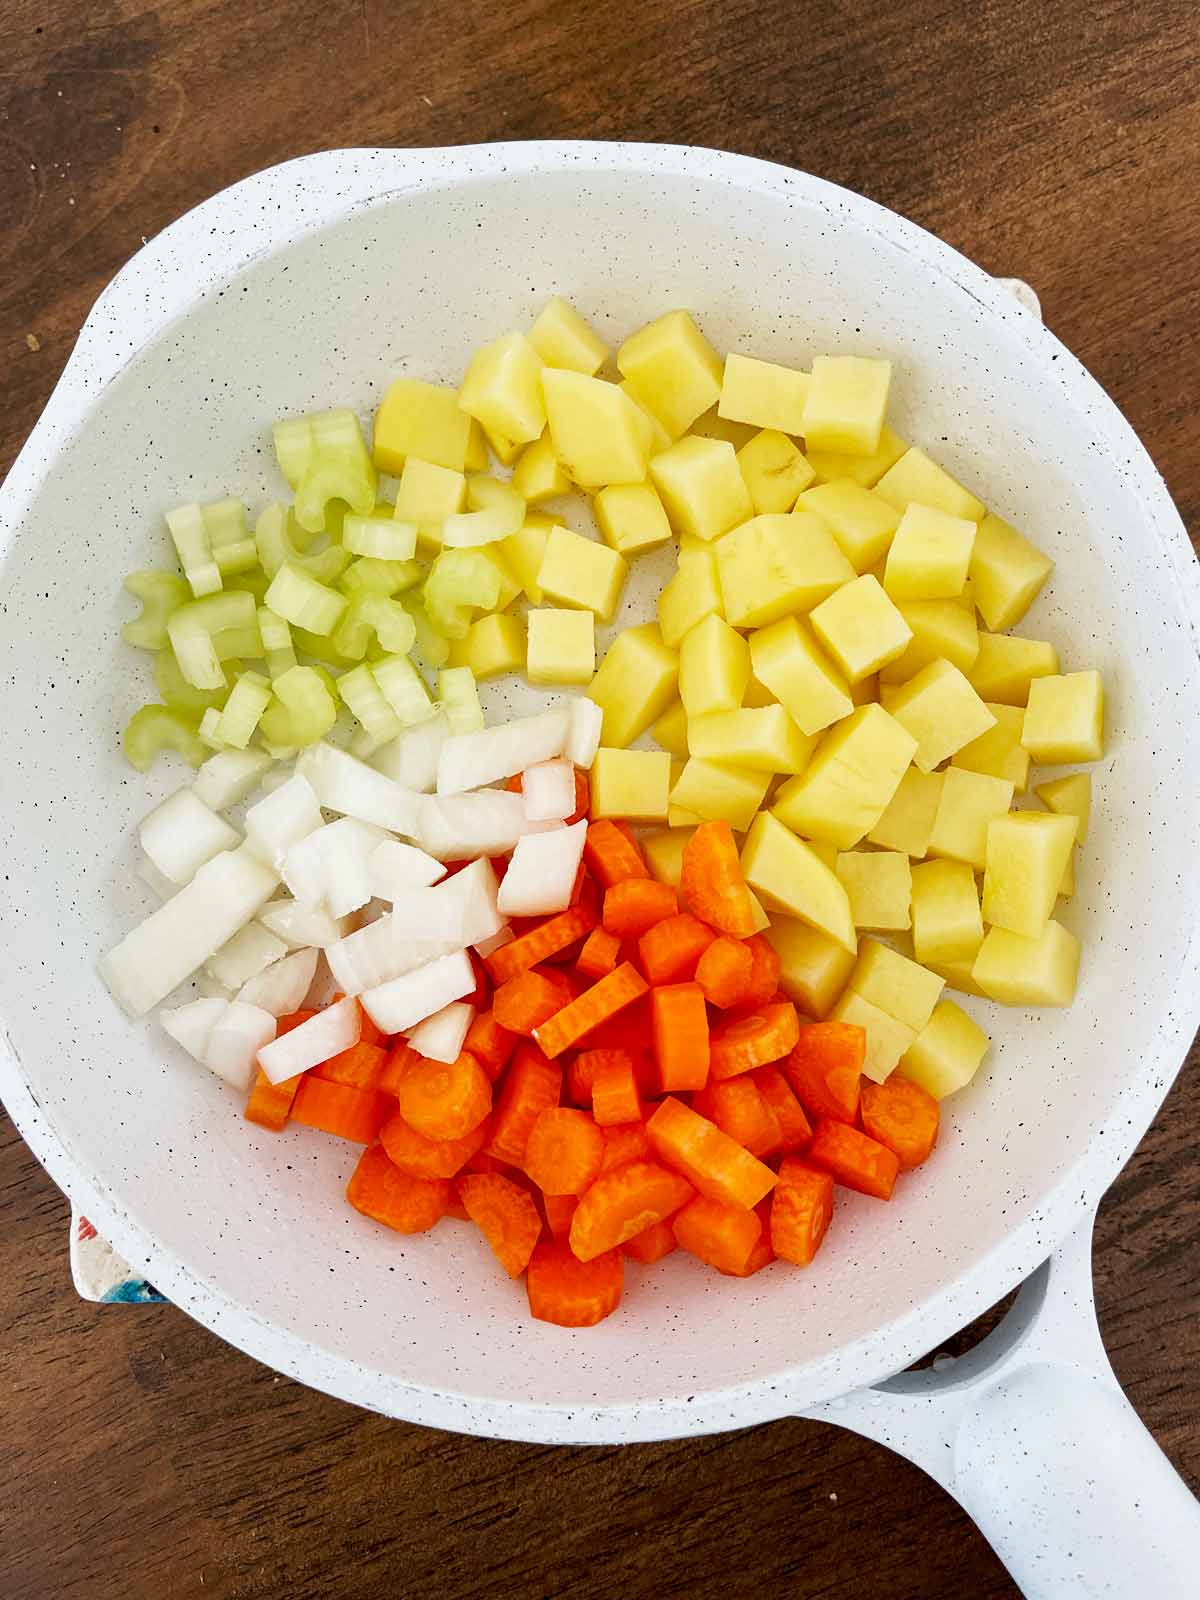
While the cauliflower is cooling, slice, dice, and prepare the vegetables.
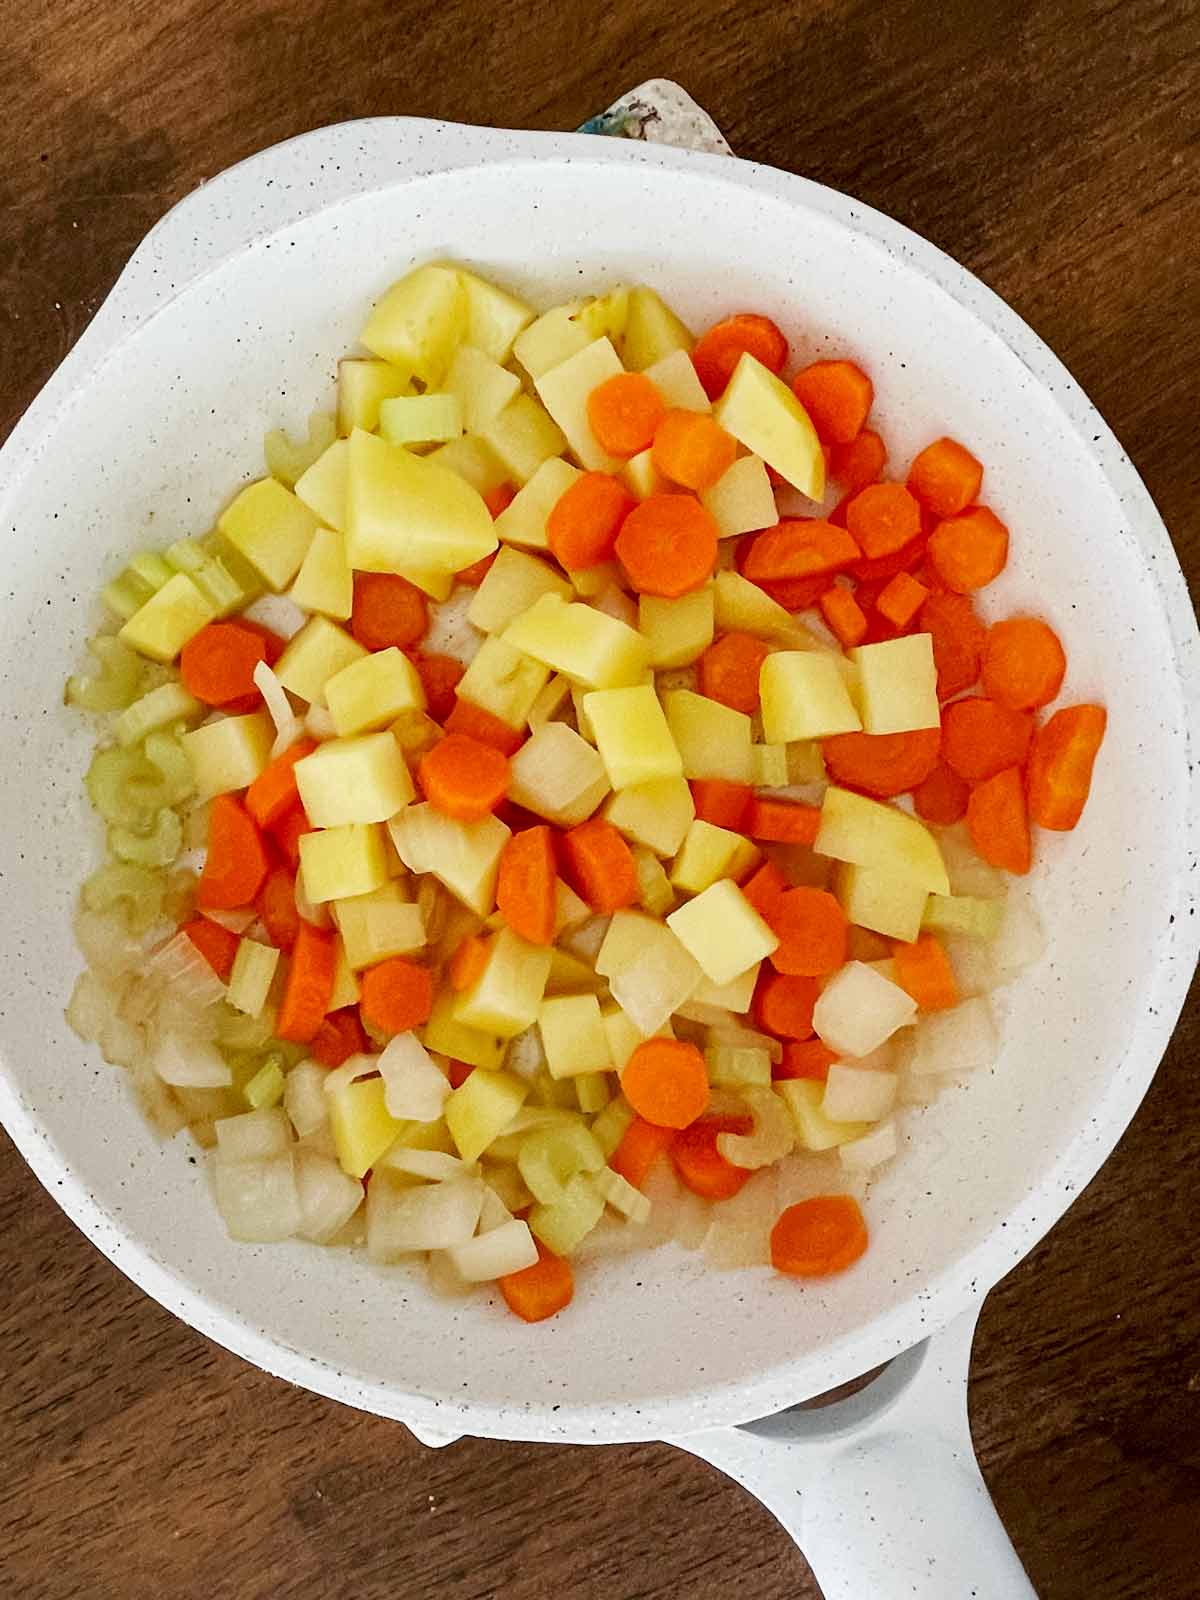
Cook over medium heat for minutes, stirring frequently until just softening.

When the cauliflower is completely cool place it on paper towels. Press down.
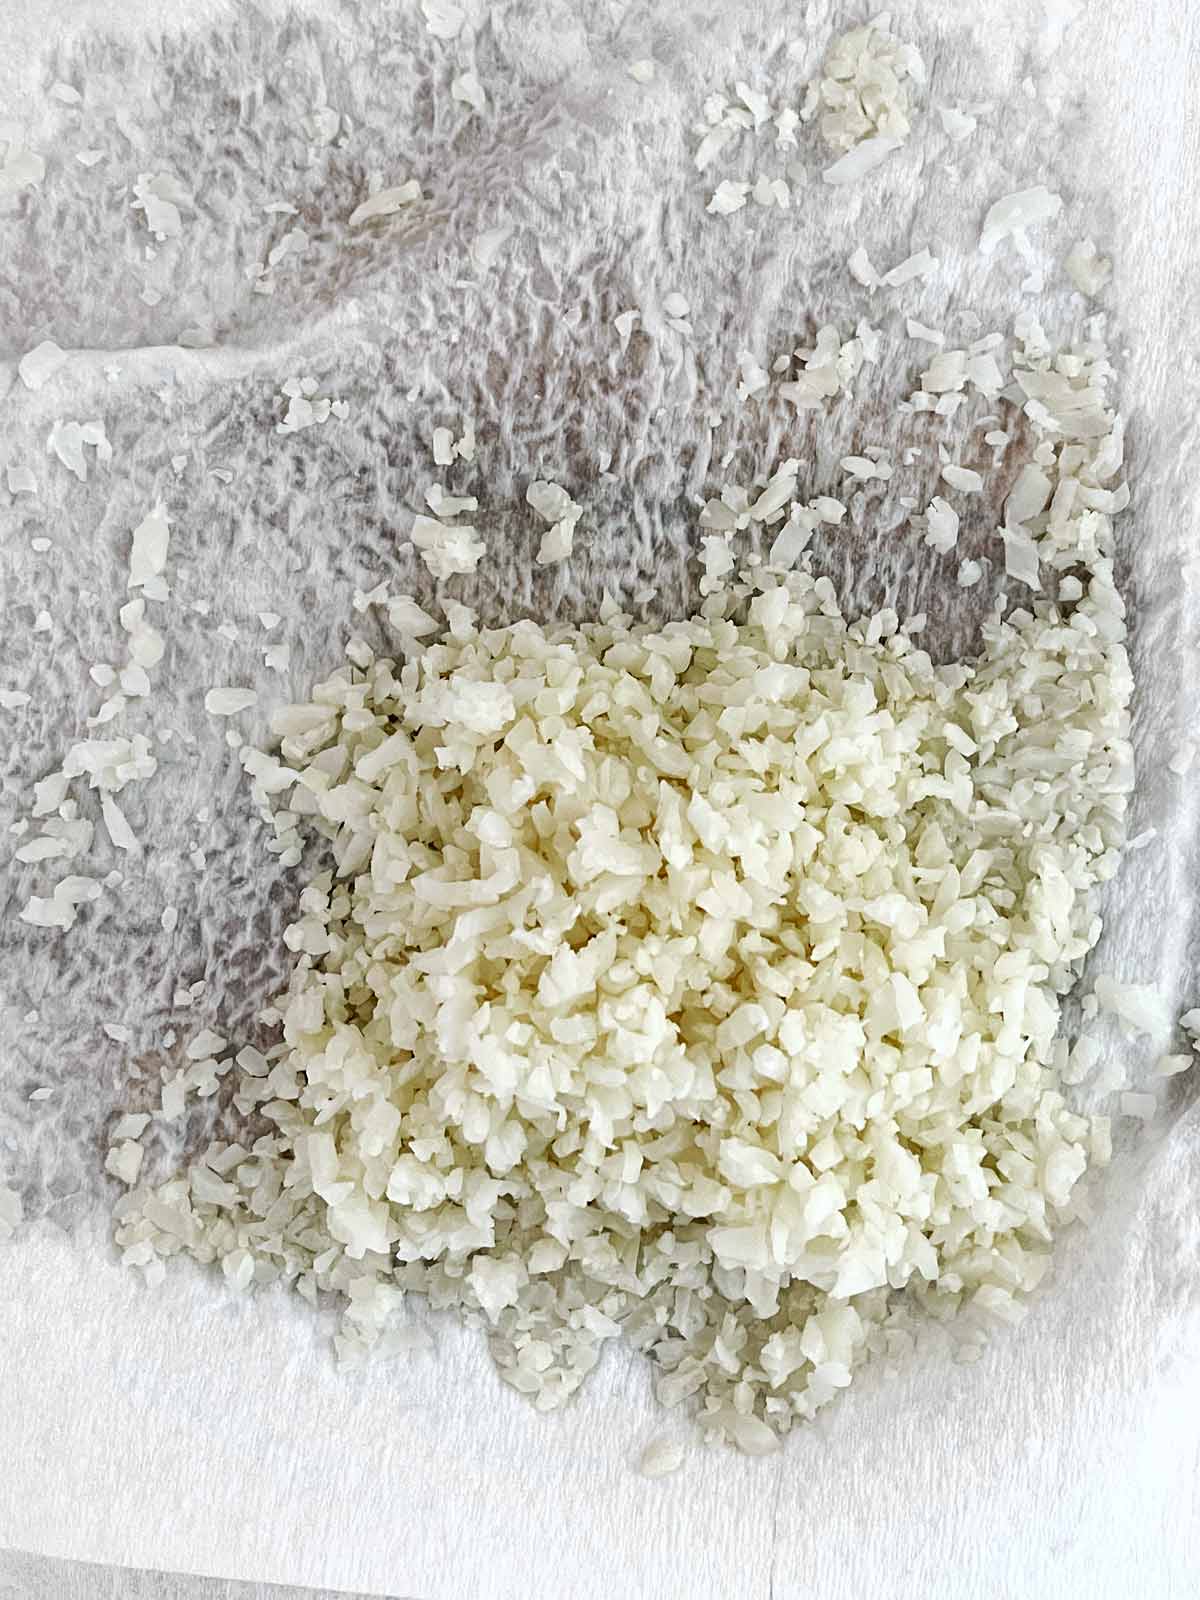
Press down firmly with your hands until all the water is removed.
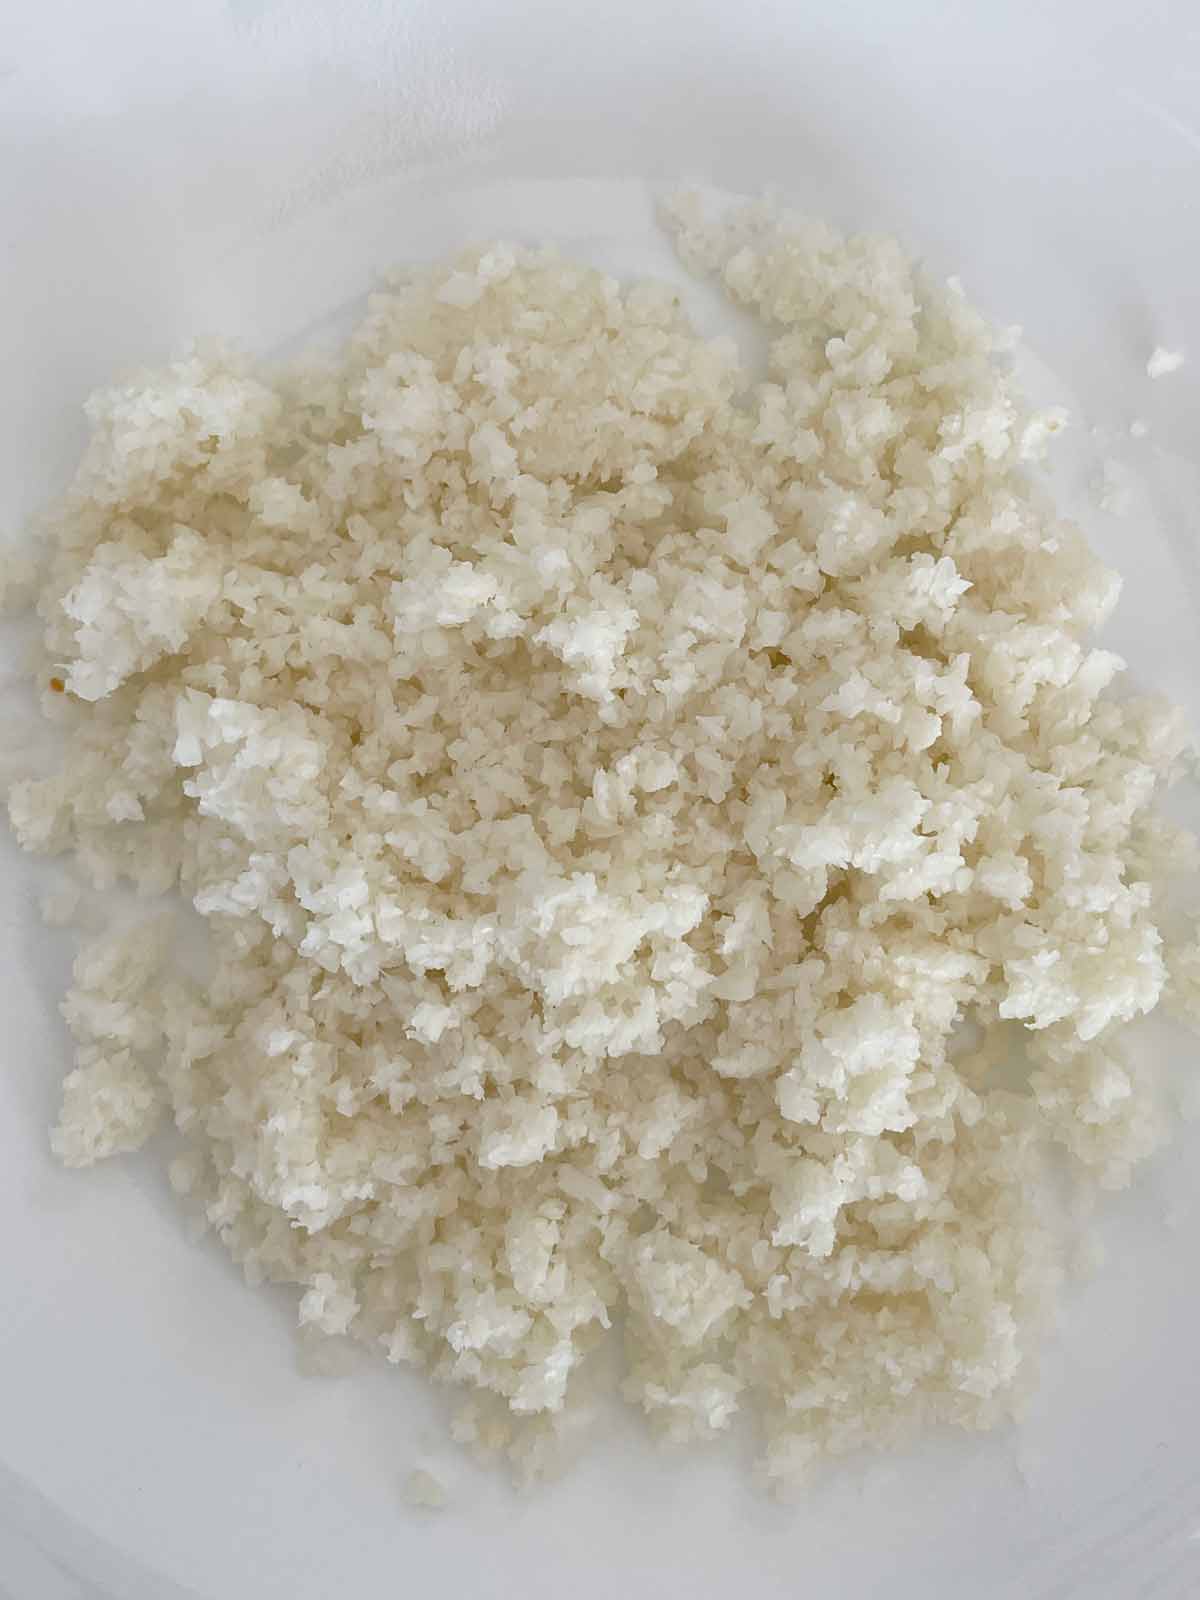
Pulse in a food processor until the cauliflower resembles grains of rice.
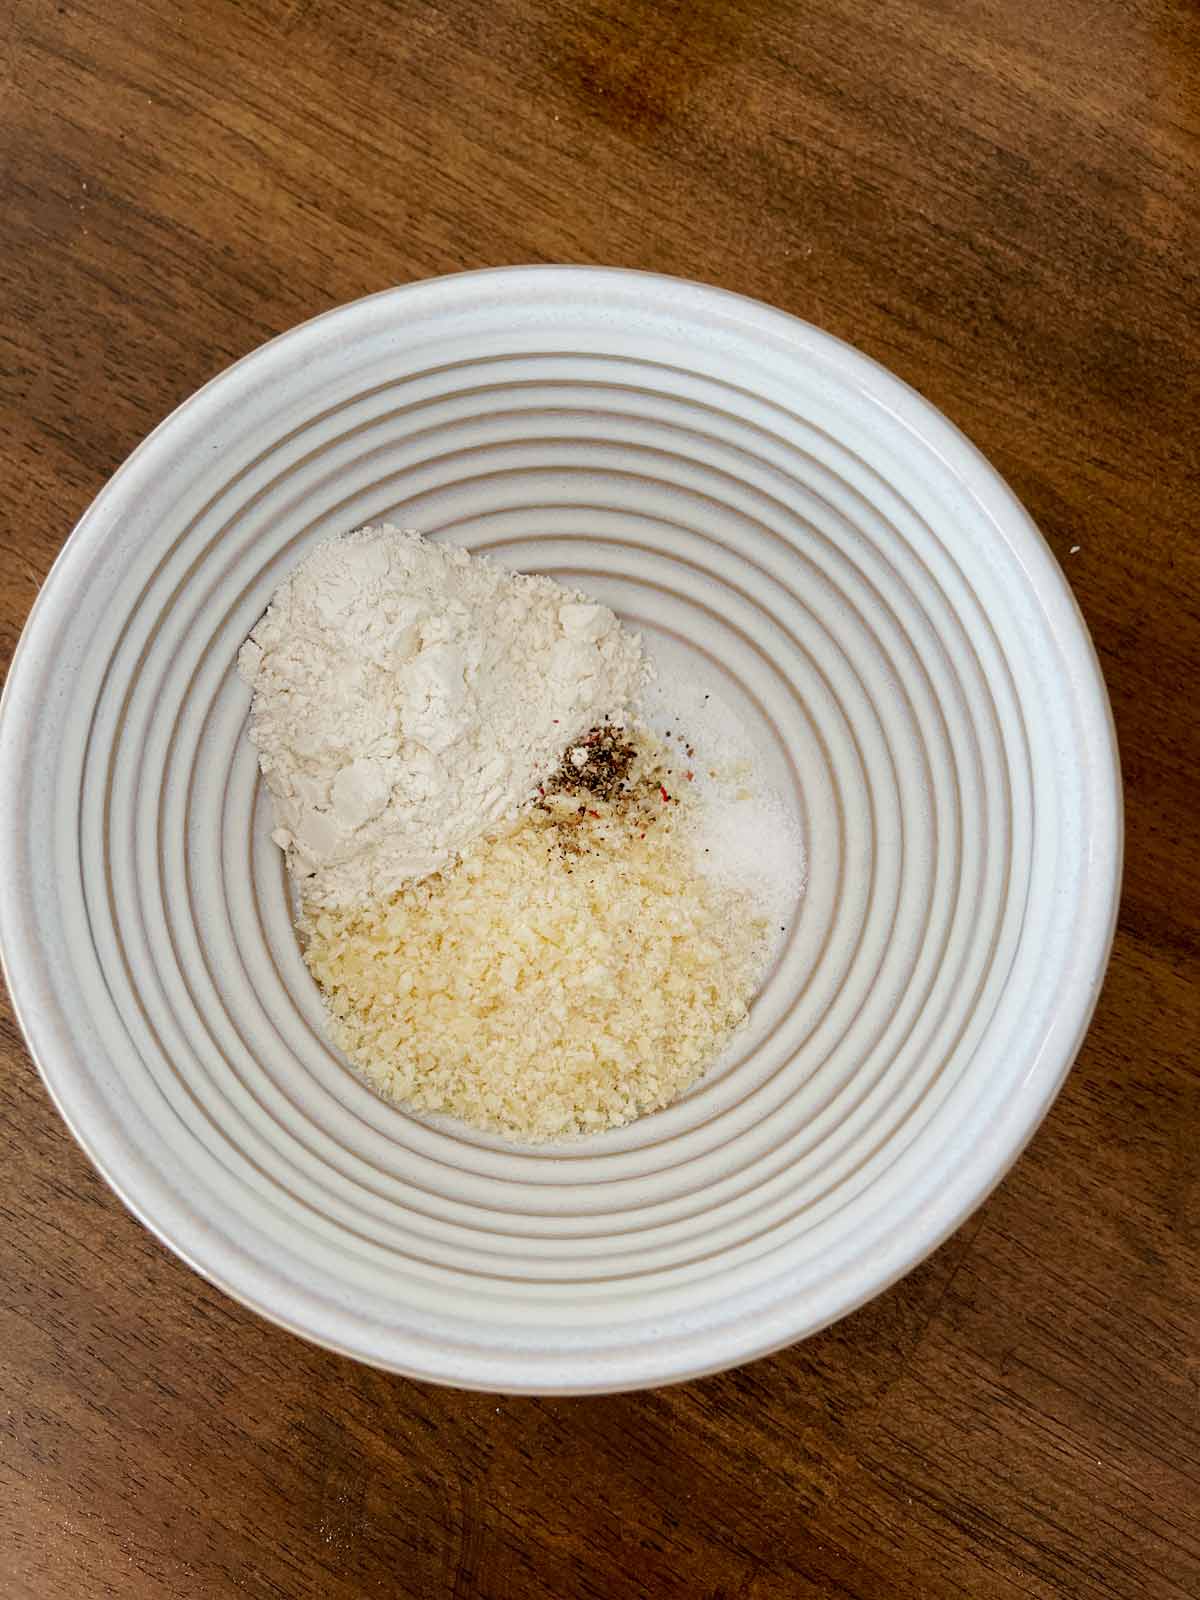
In a medium bowl add the Parmesan, flour, salt, and pepper.
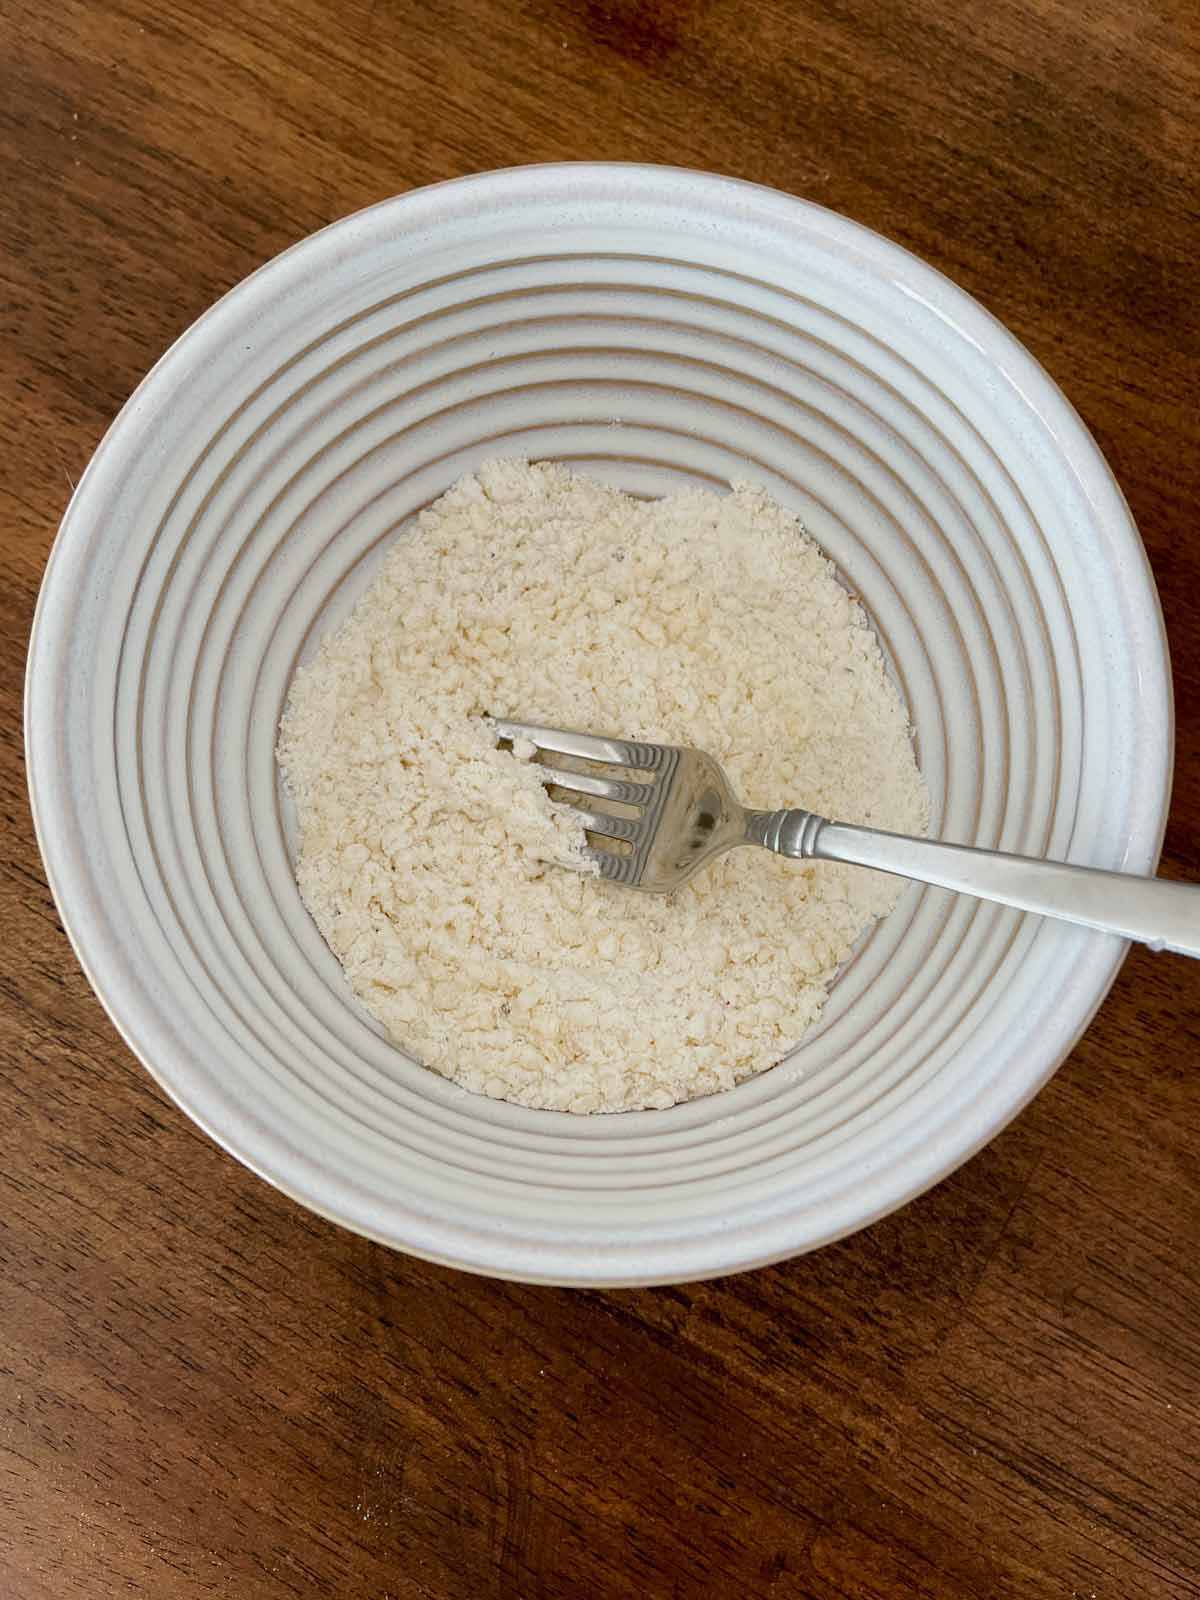
Use a fork to mix all the ingredients together.
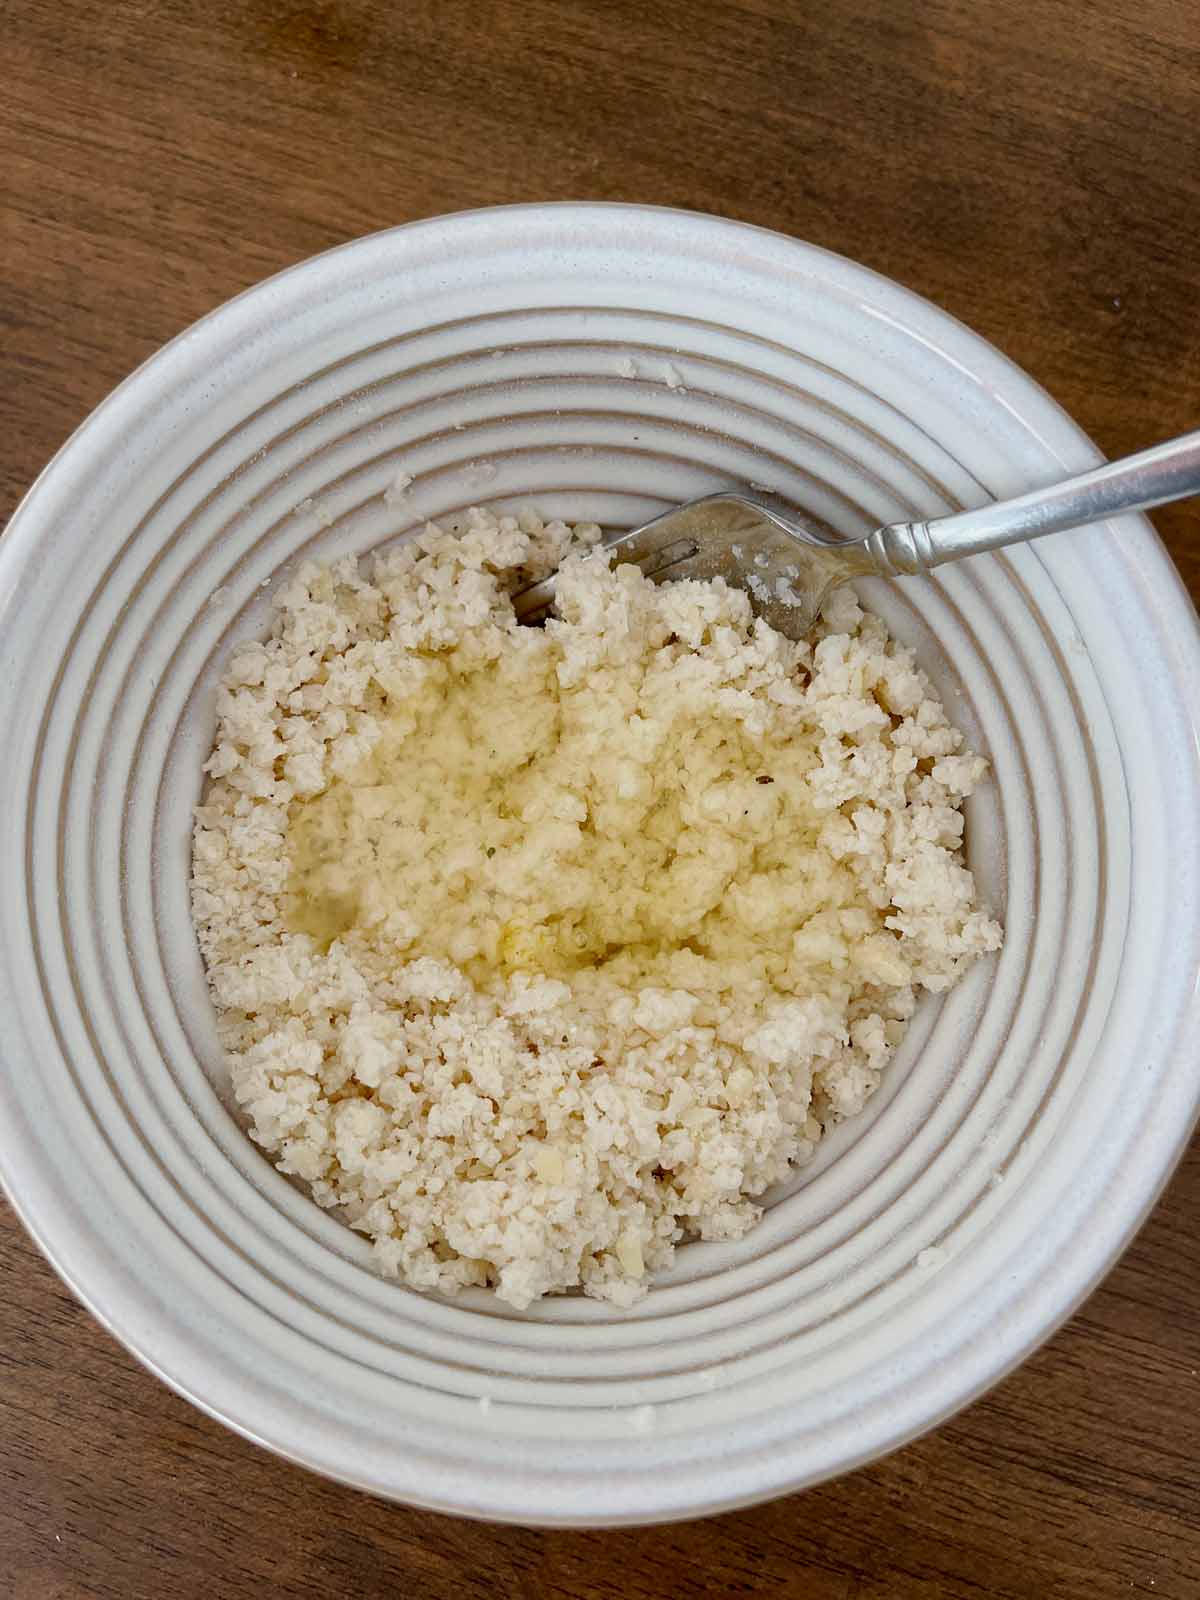
Add the egg and stir until the mixture resembles a rough dough.
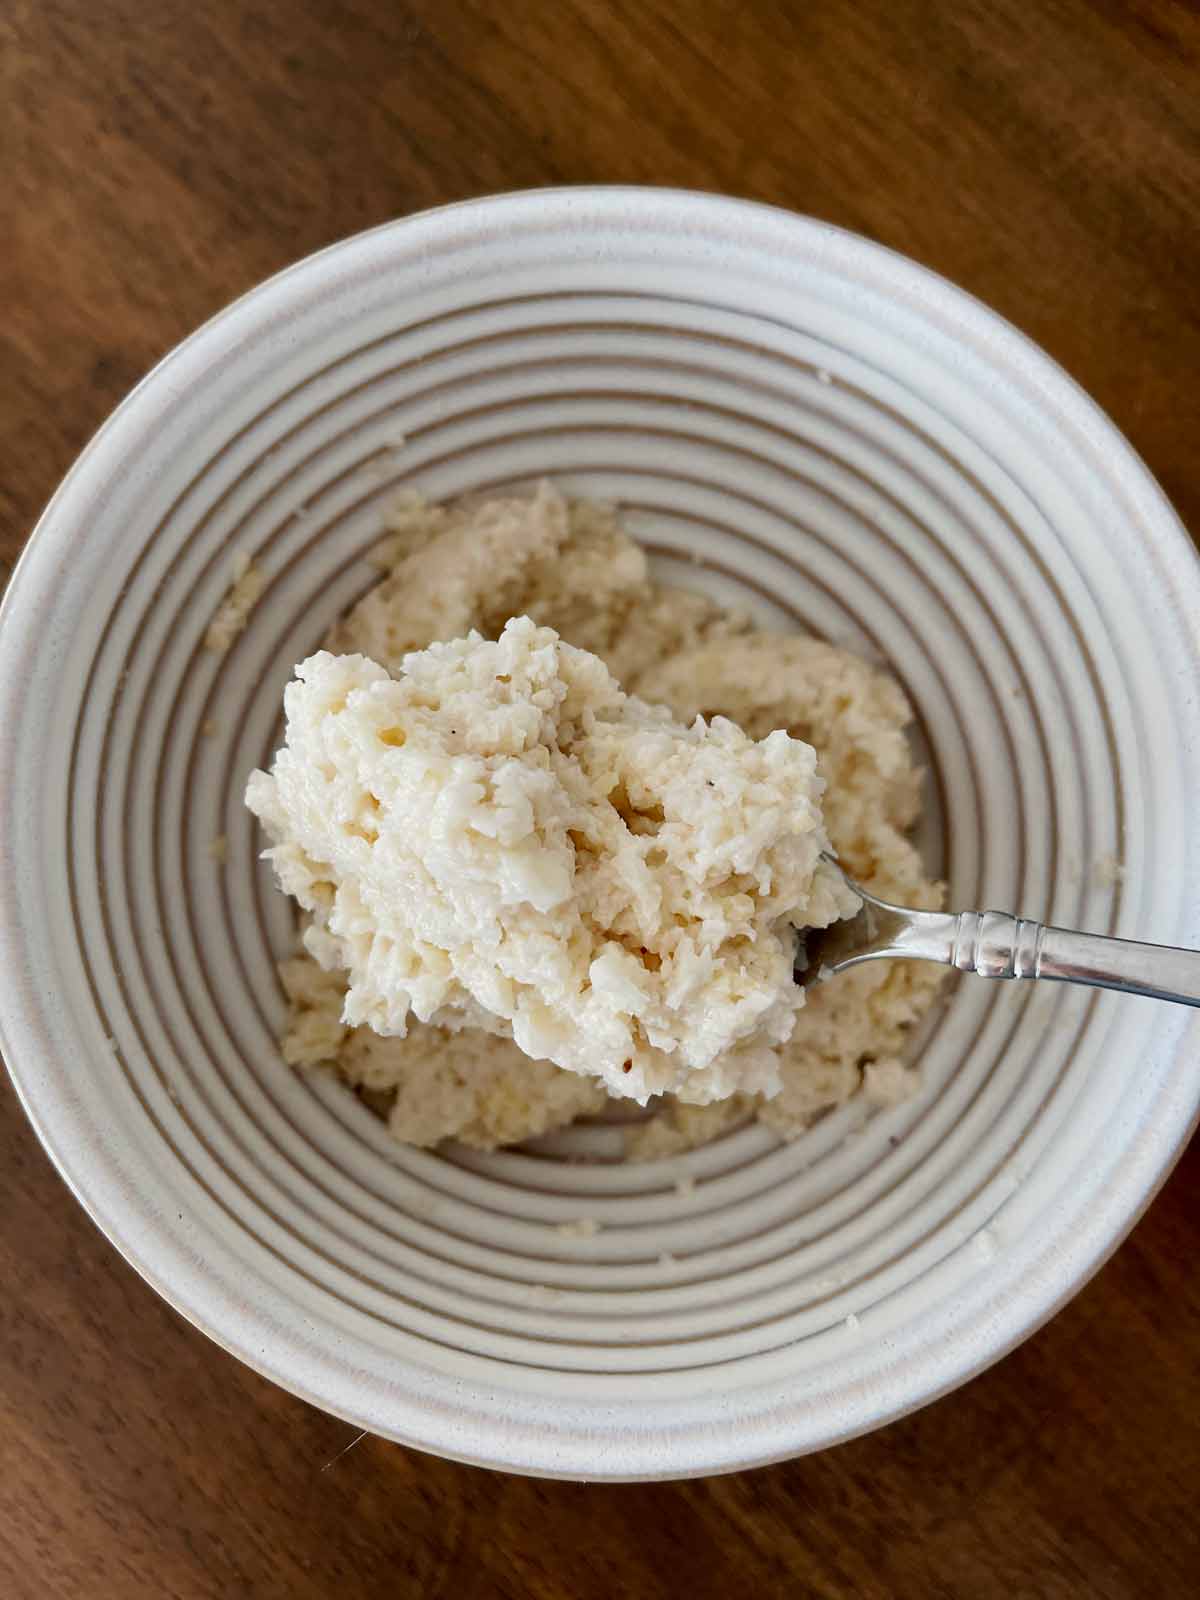
The crust mixture is ready when it can stay on the fork. Divide dough in half.
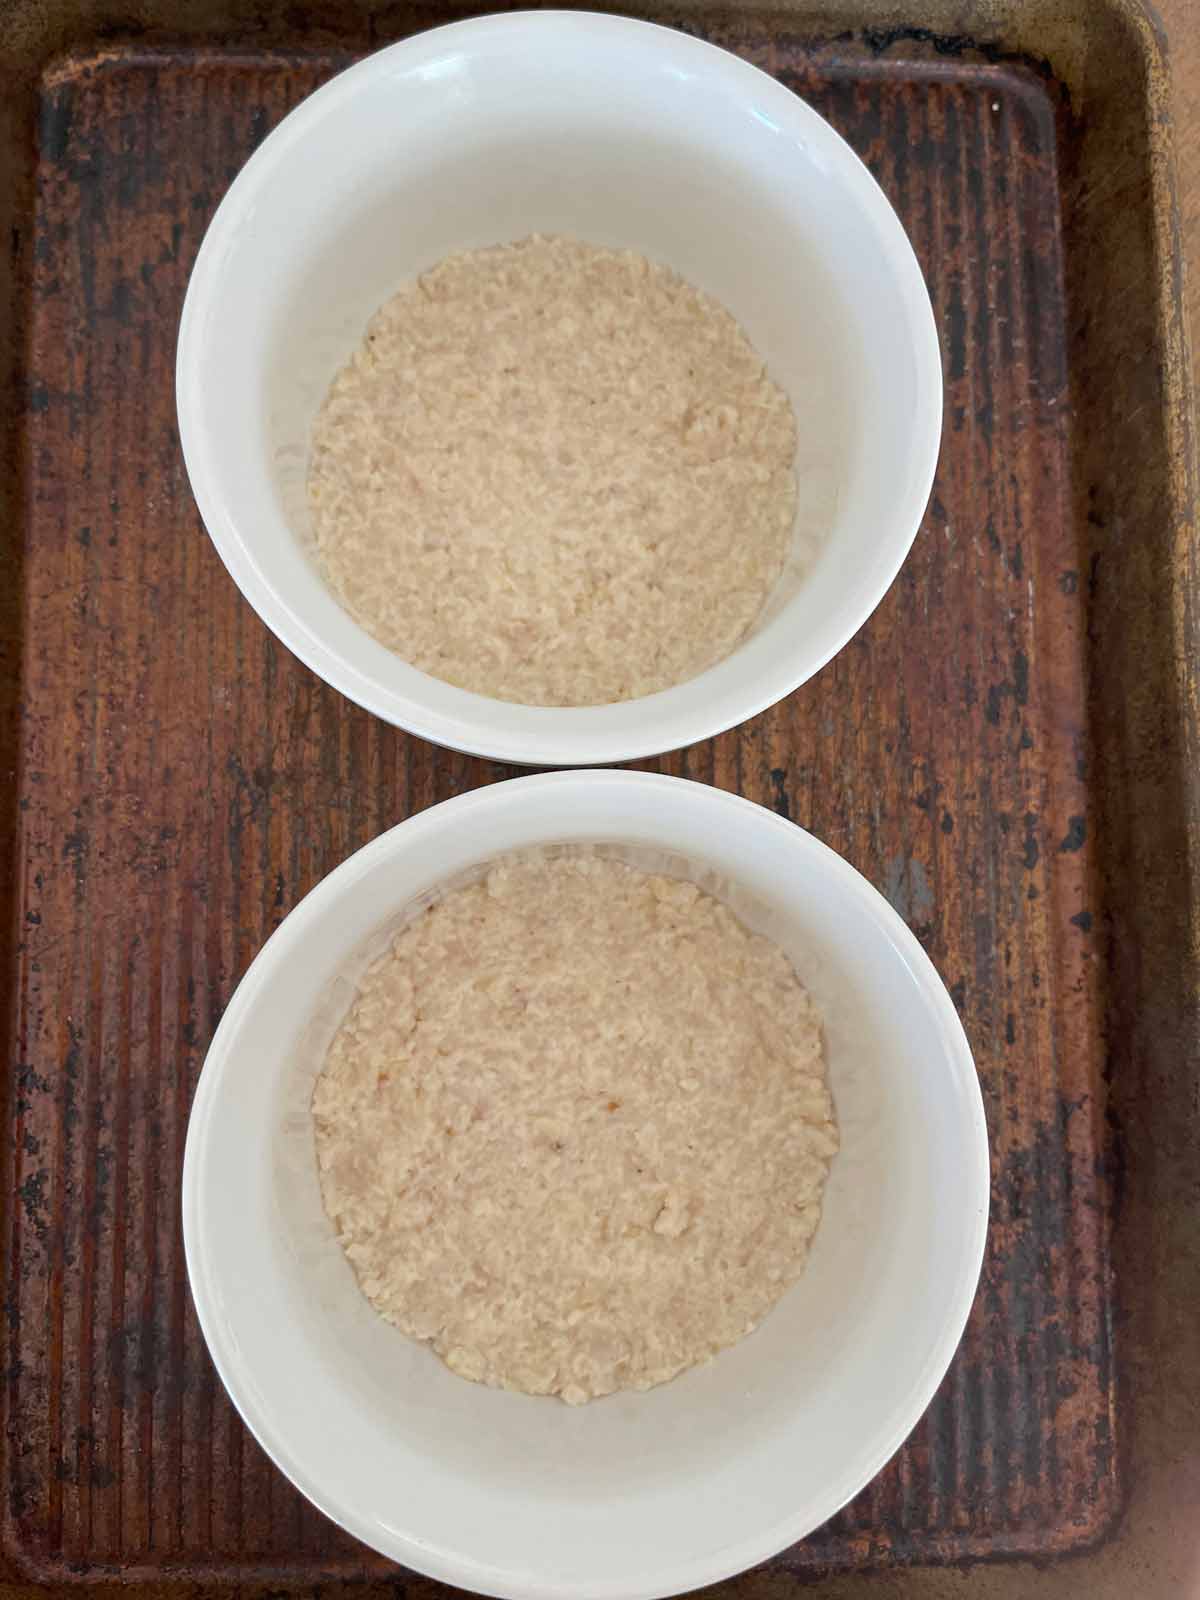
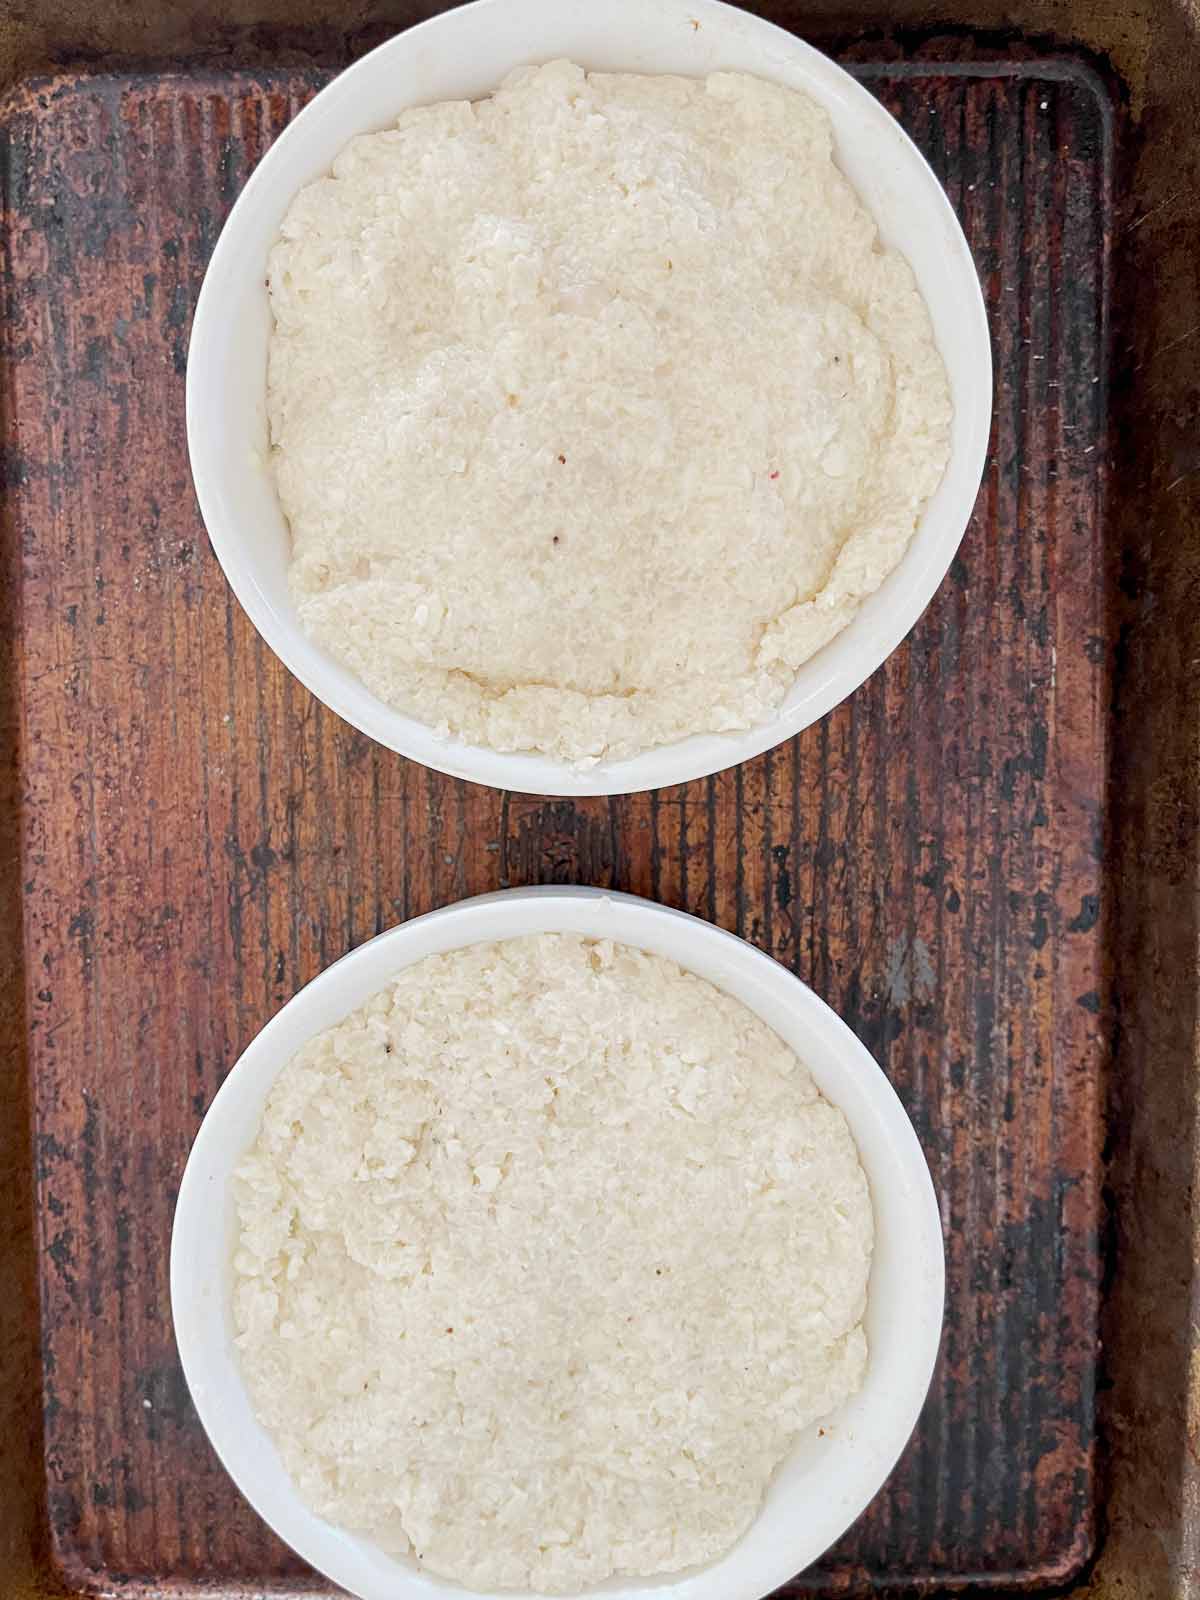
Take one half and divide again. Press the dough into the bottoms of the ramekins.
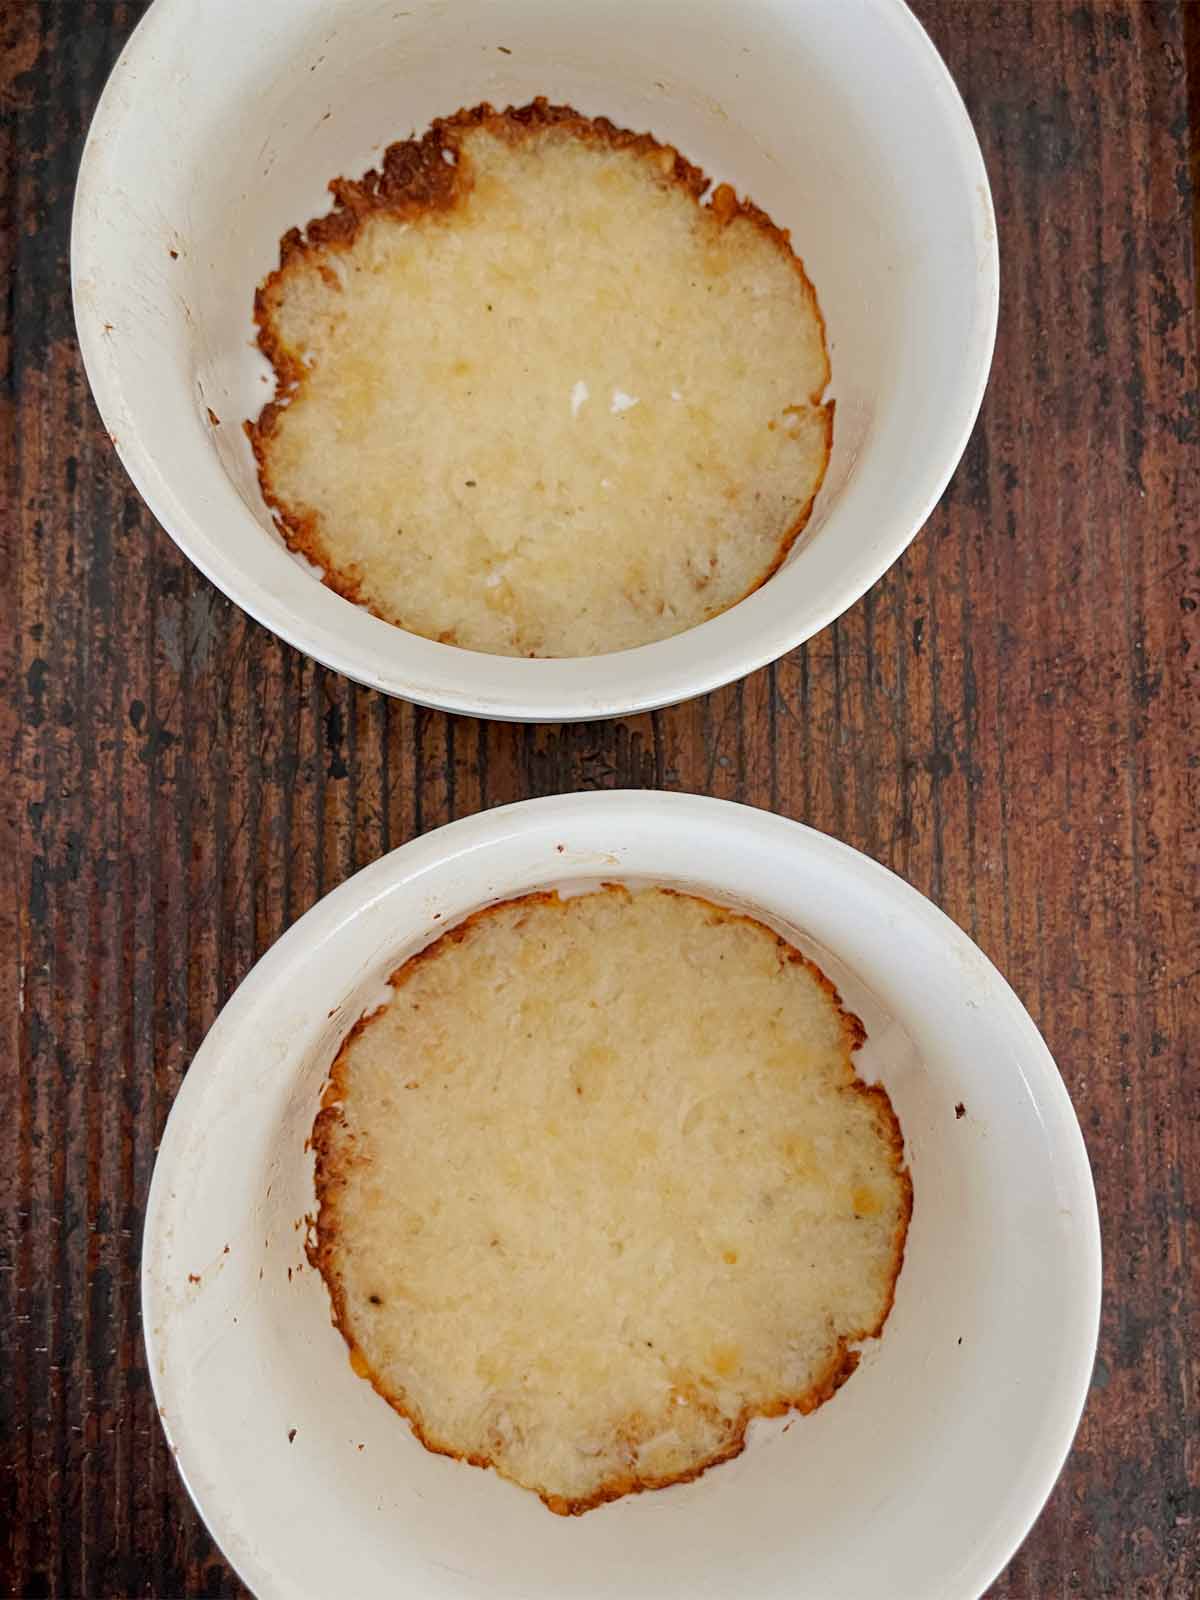
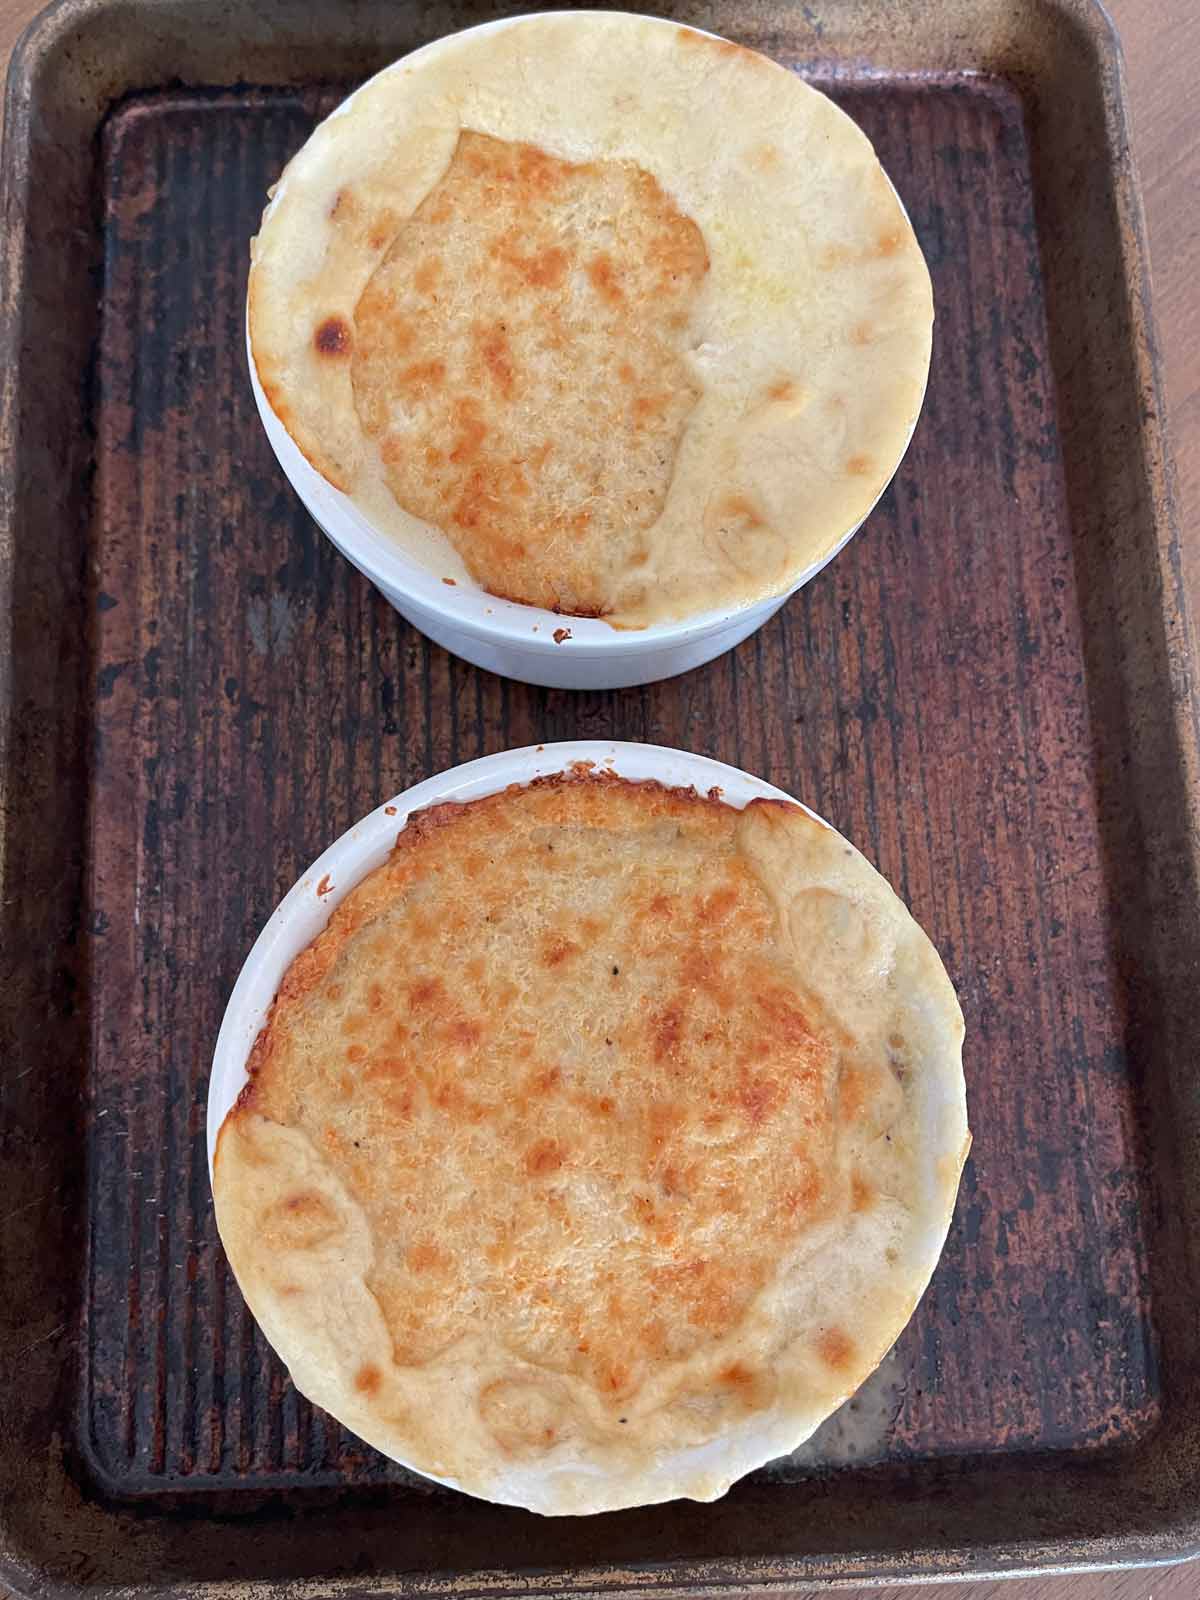
Bake in 425-degree oven for approx 20 minutes or until edges are browning.
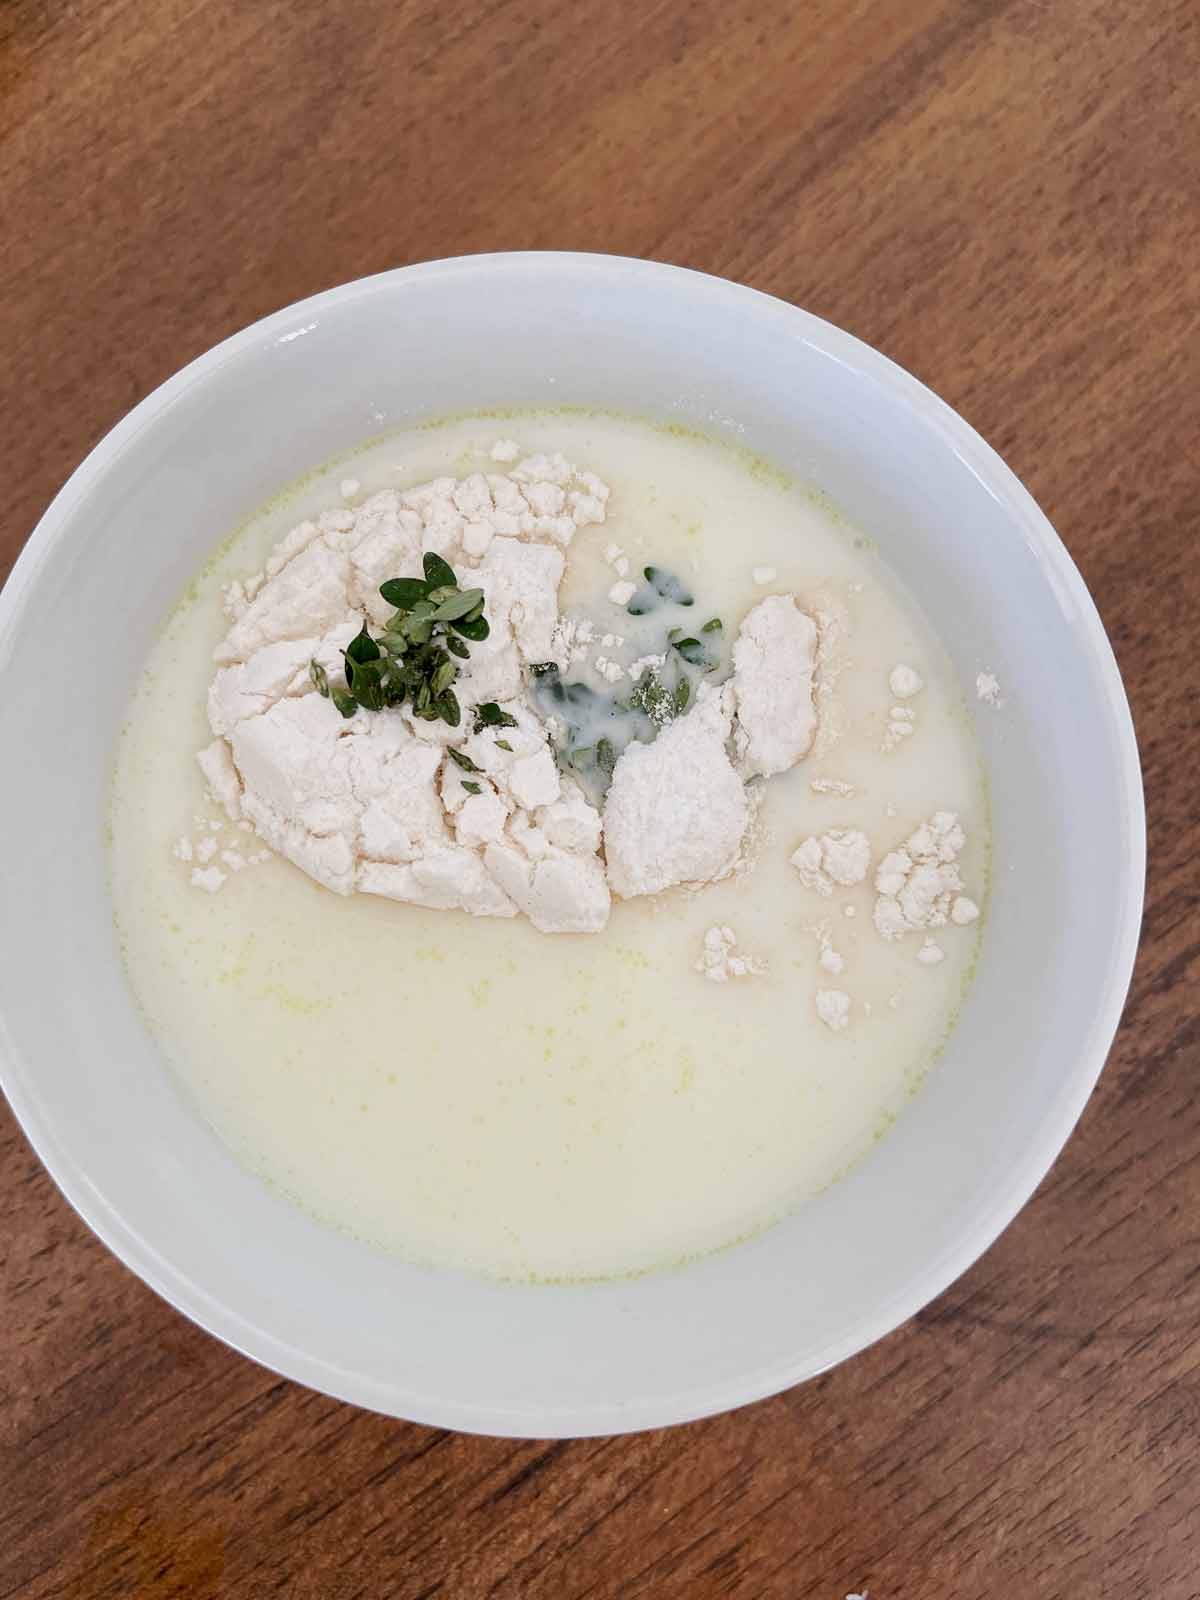
Add the milk, chicken broth, 1 TBS flour, thyme, garlic, and salt to a bowl & mix.
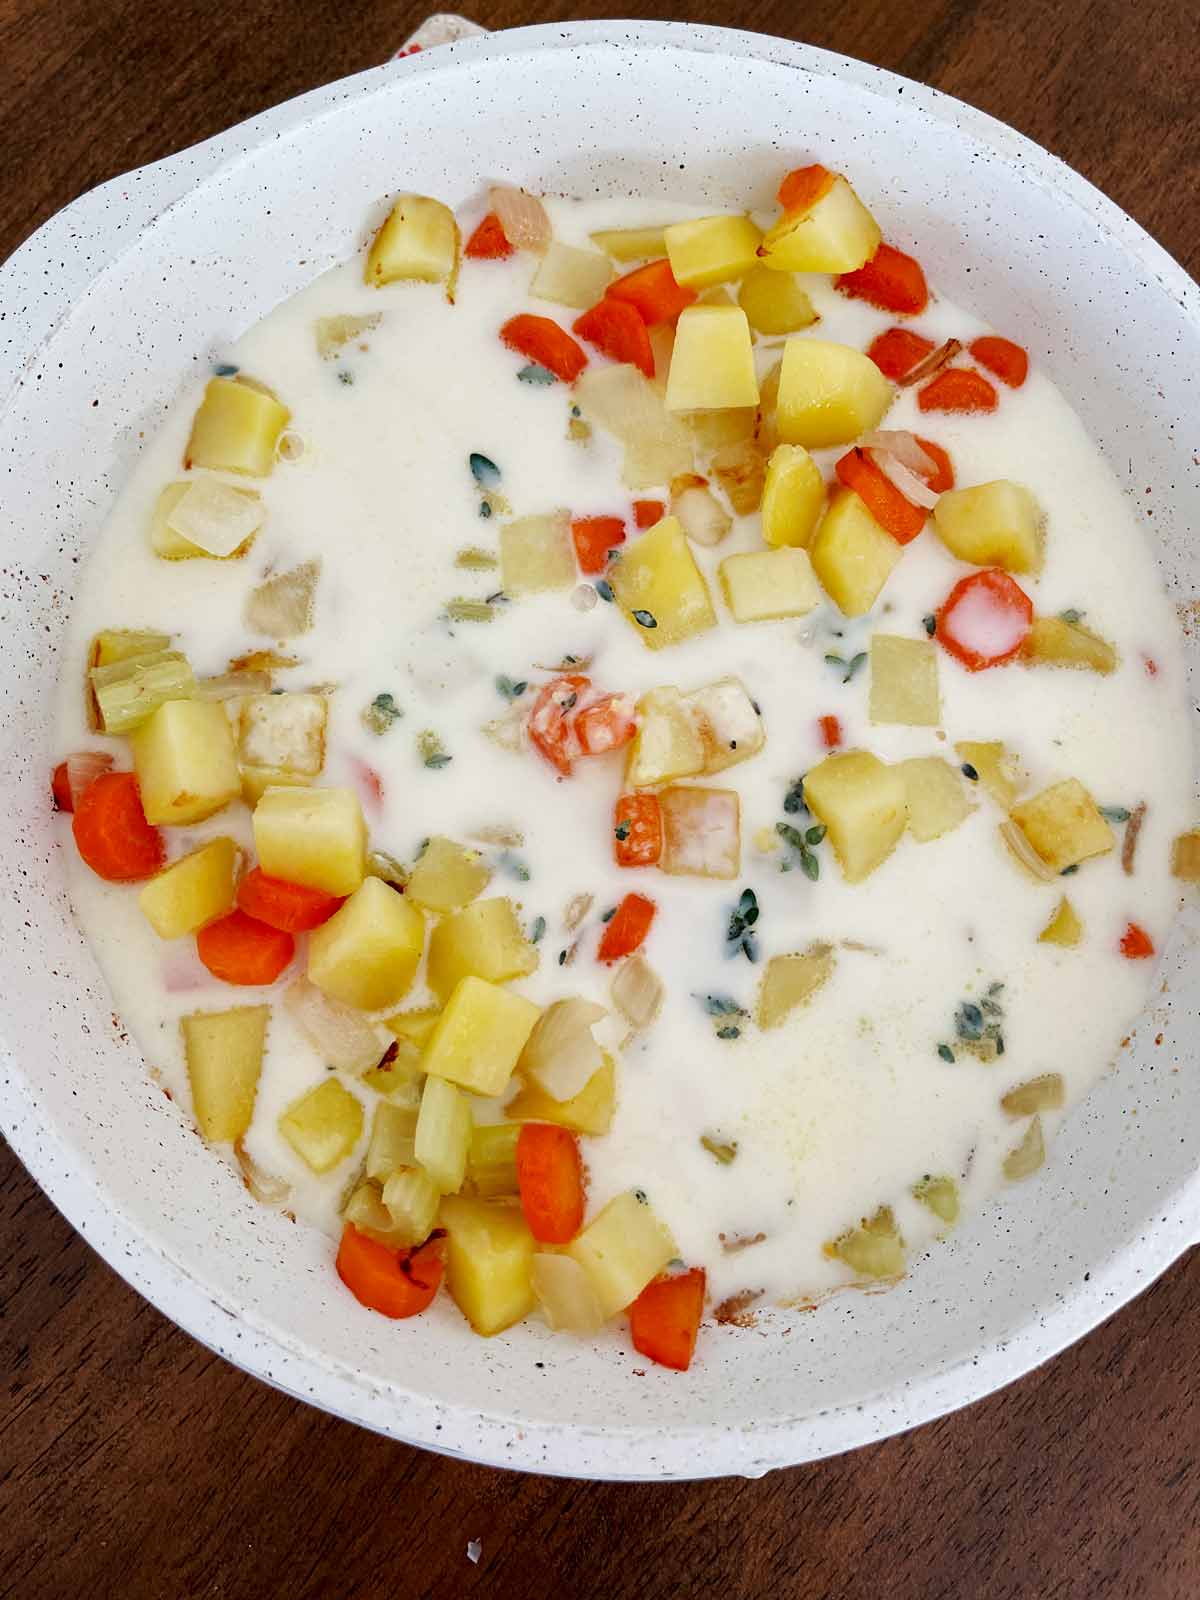
Pour into the skillet with the vegetables and heat until the sauce is just bubbling.
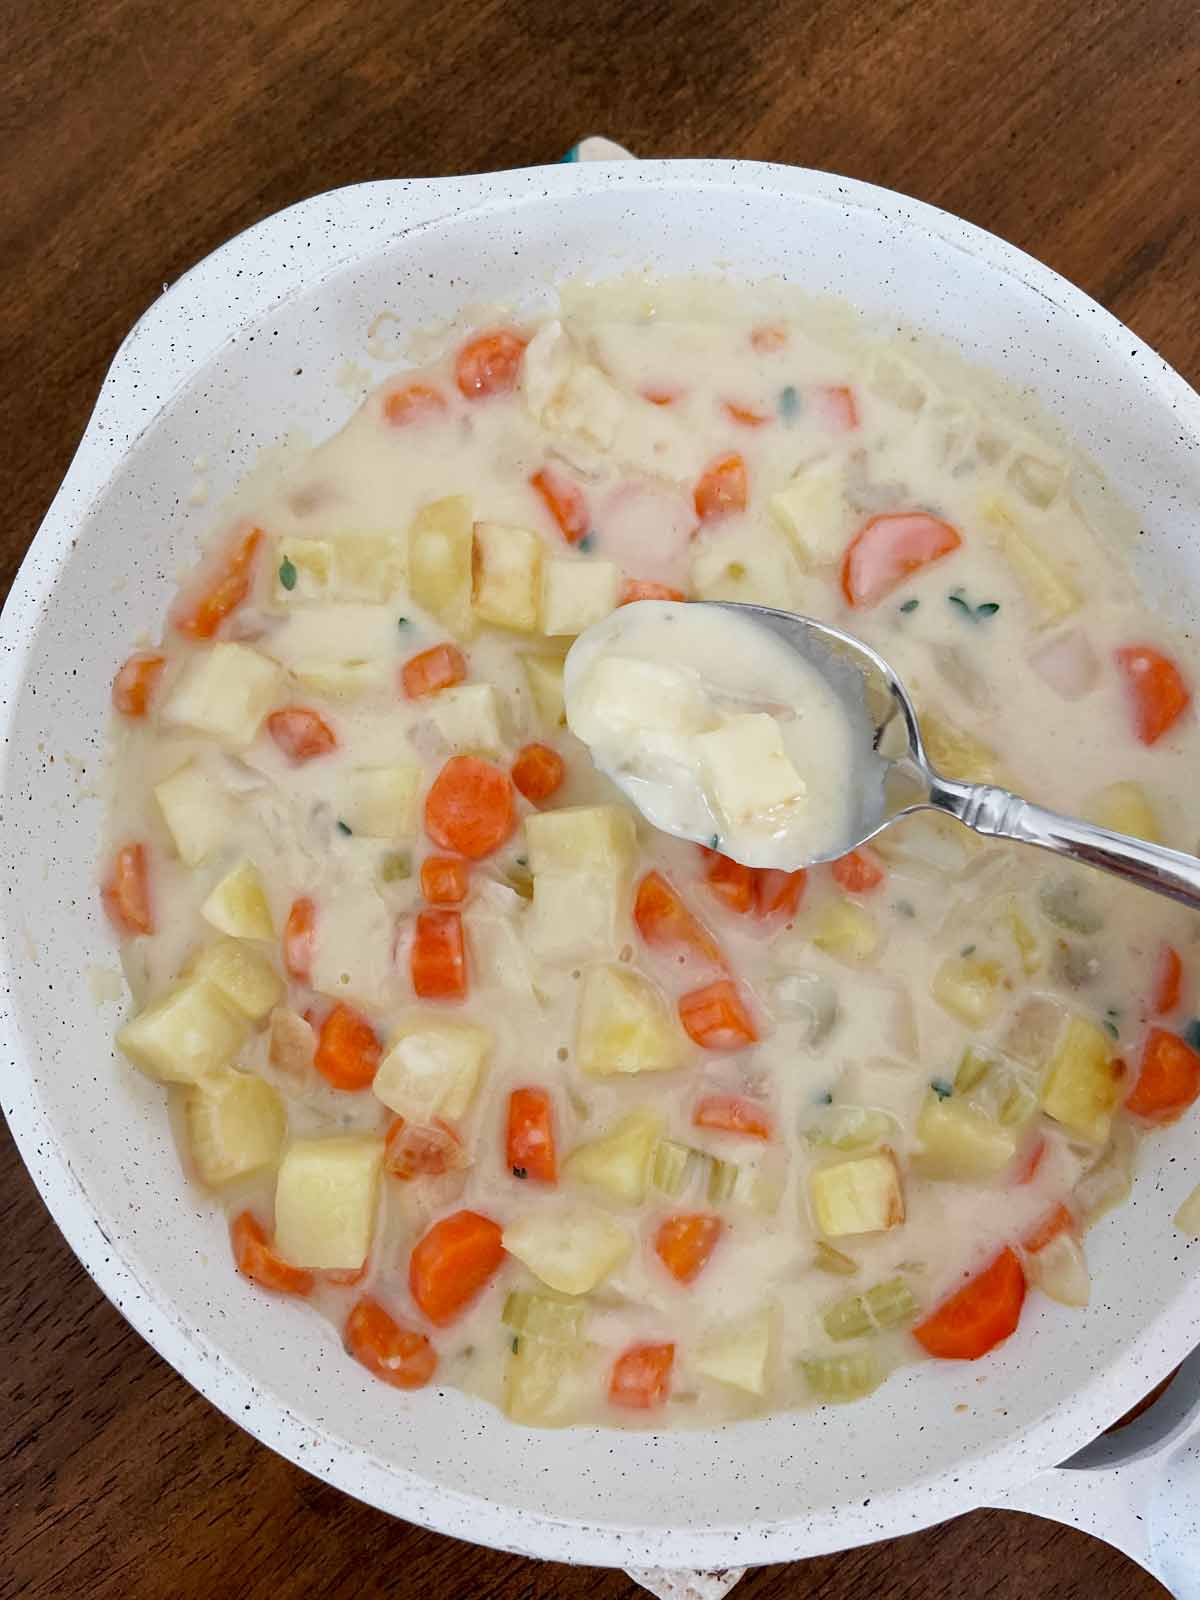
When the sauce thickens remove it from the heat.
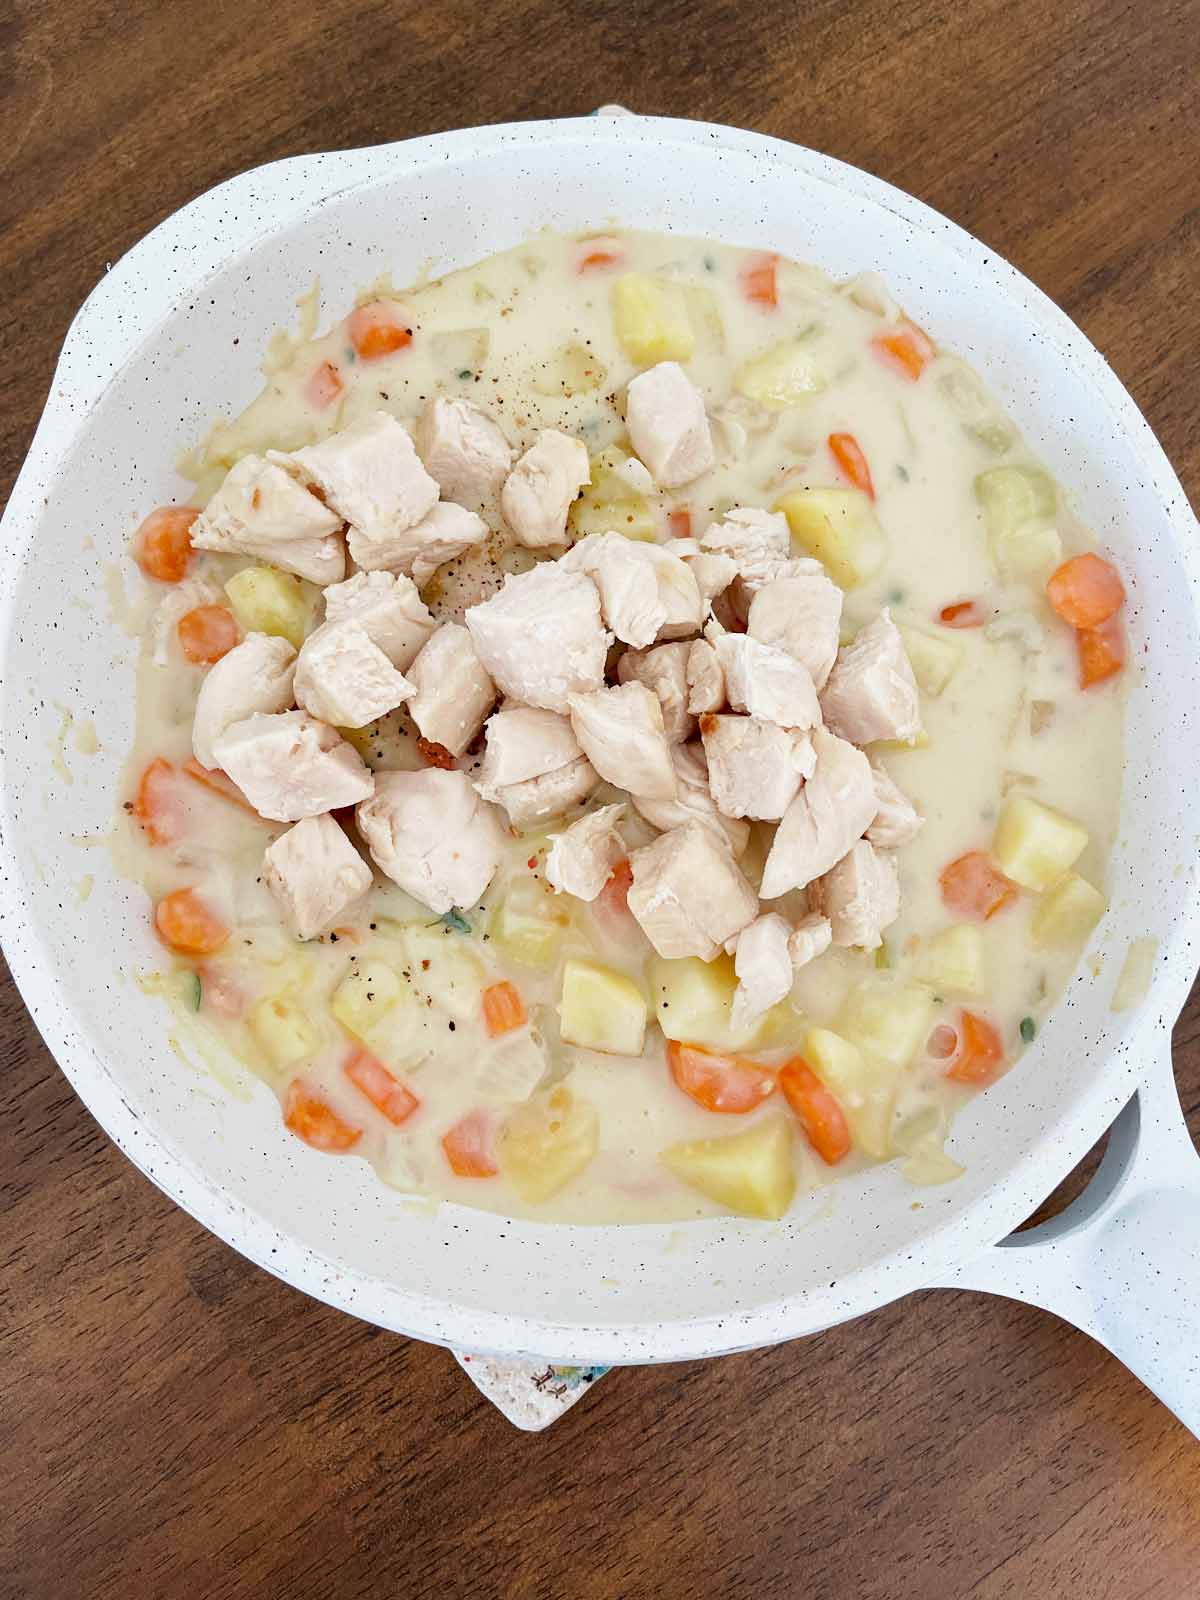
Add the cubed chicken to the skillet and stir gently.
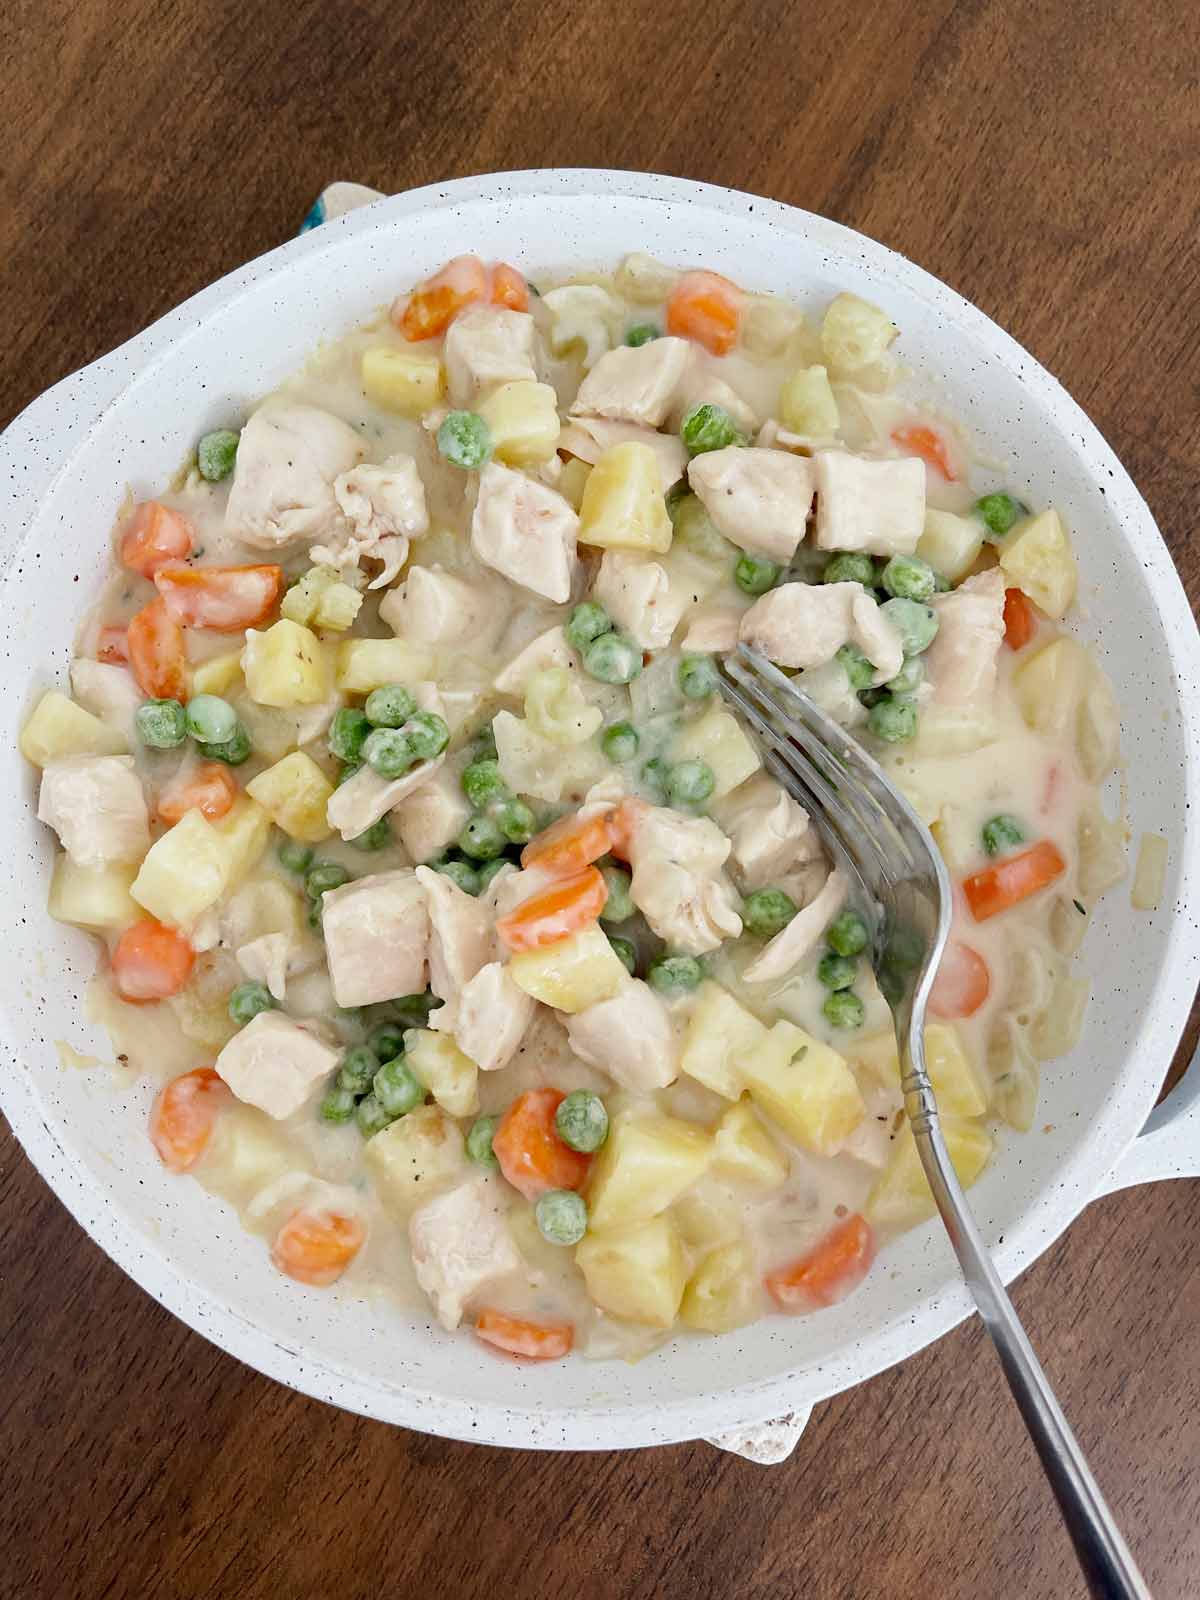
Add frozen peas if desired and mix in gently.
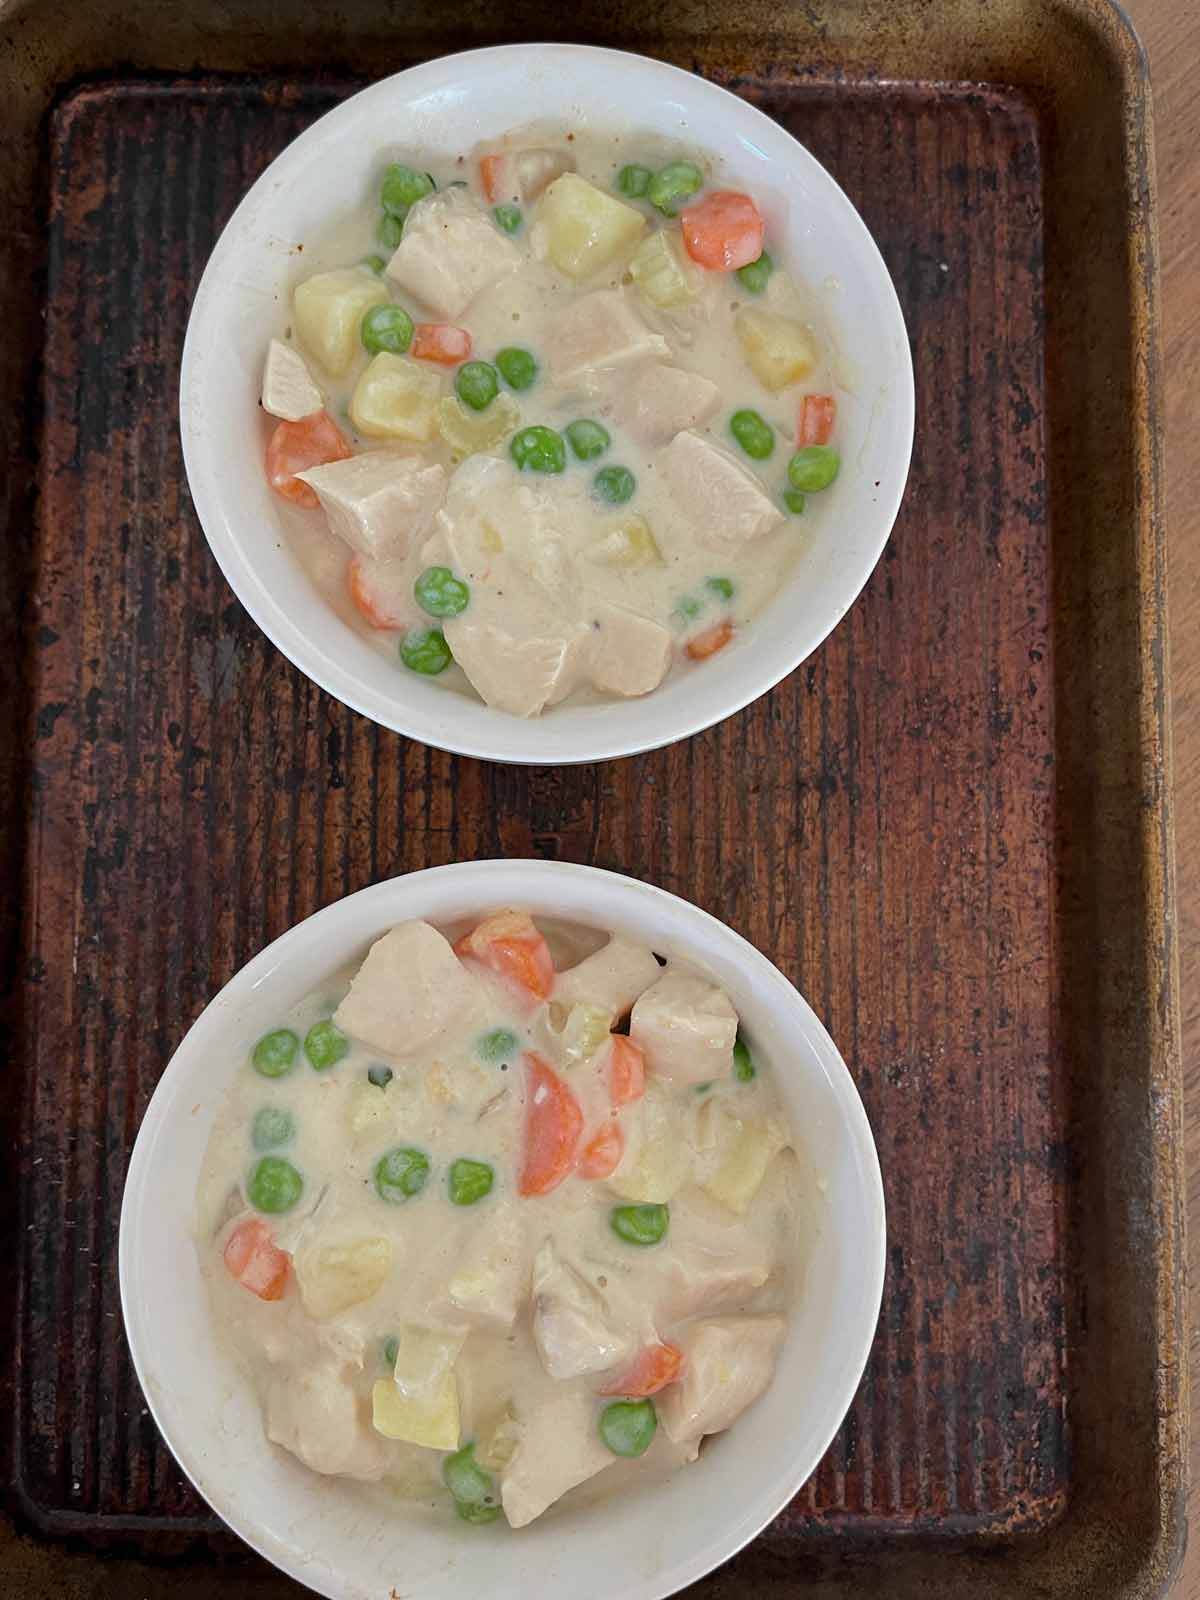
Divide the filling mixture between the ramekins with bottom crusts.
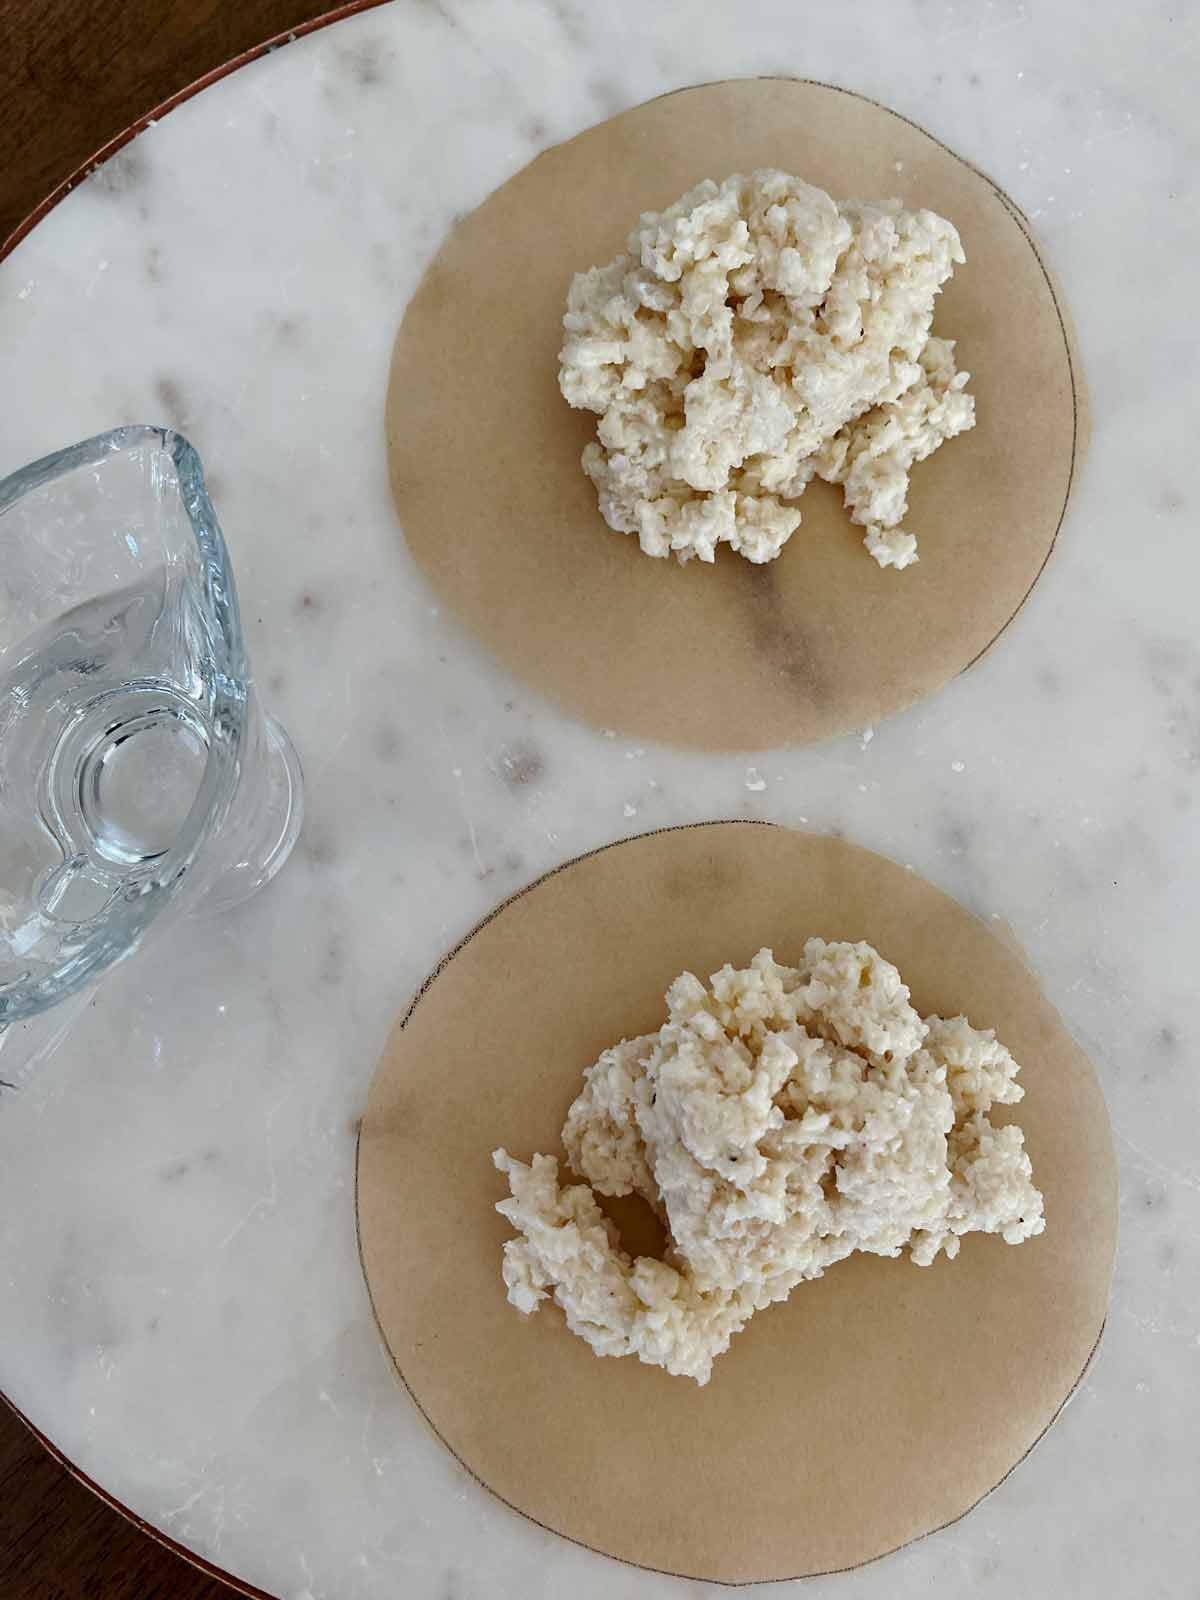
Divide the crust mixture into two. Place on ramekin-sized parchment circles.
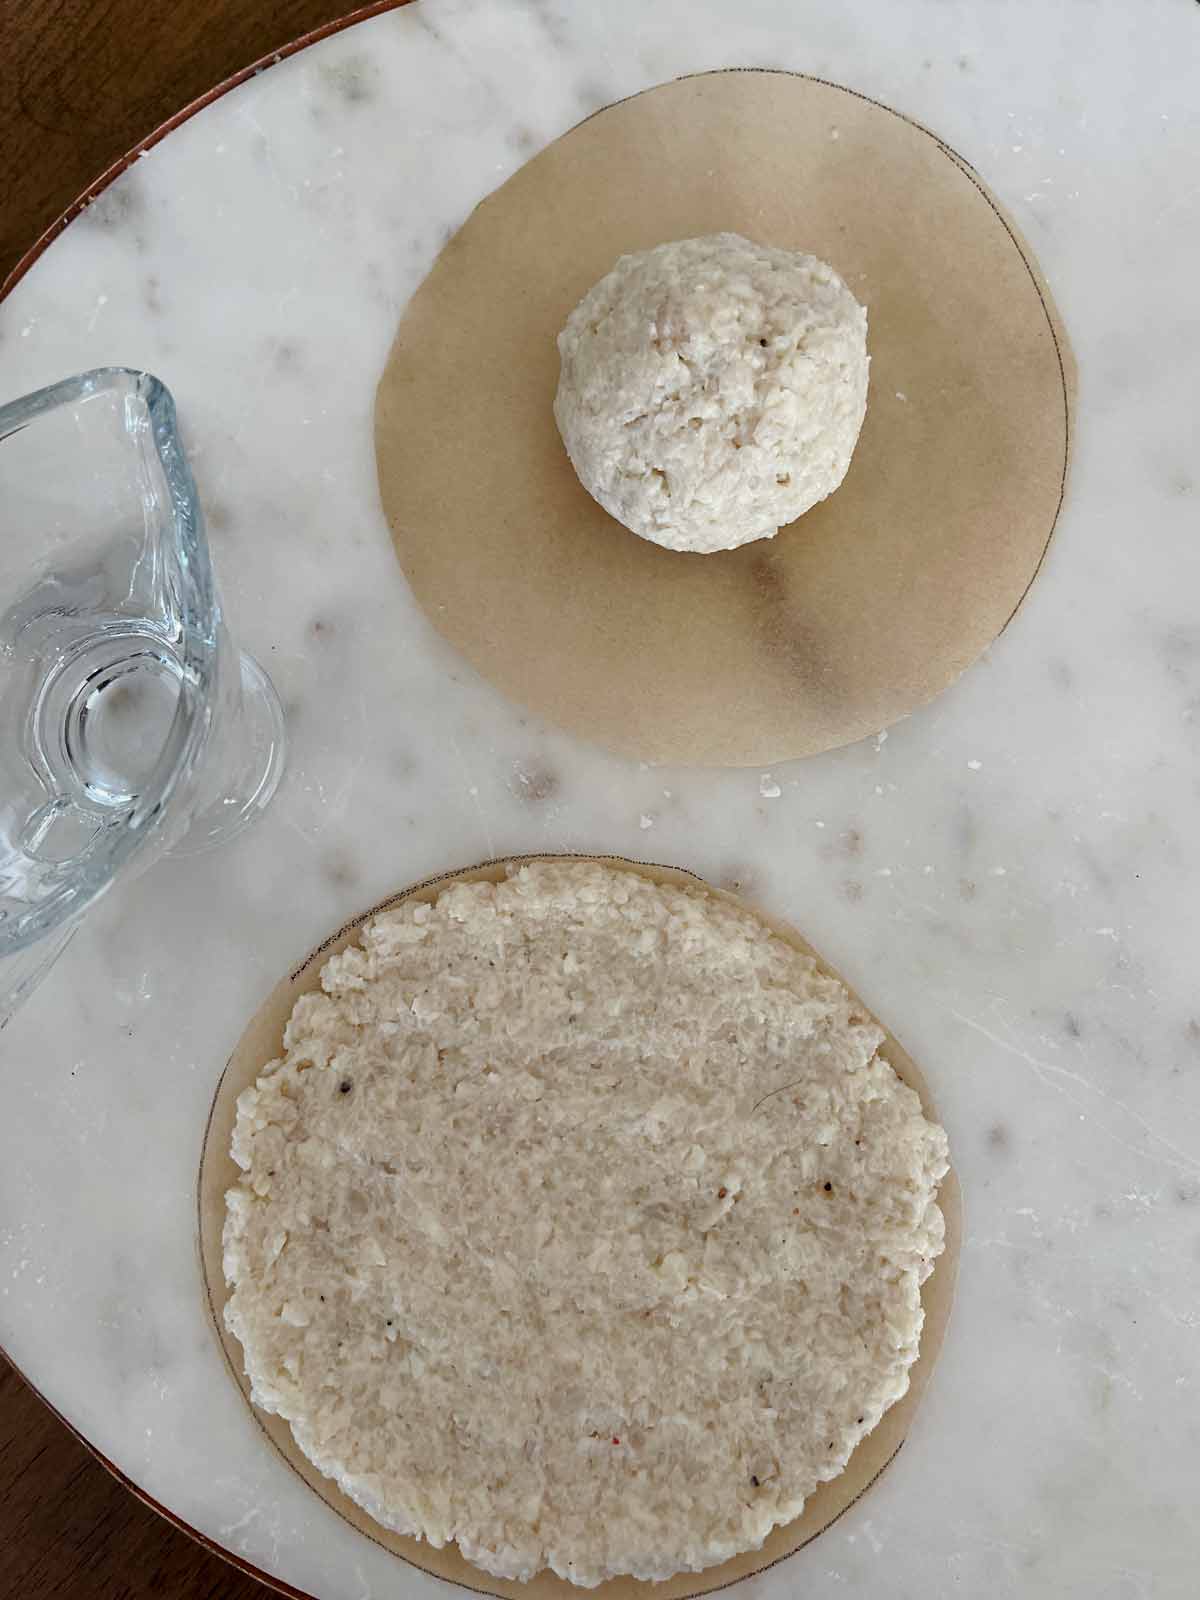
Make dough balls. Using wet fingers, press the crust onto the parchment.
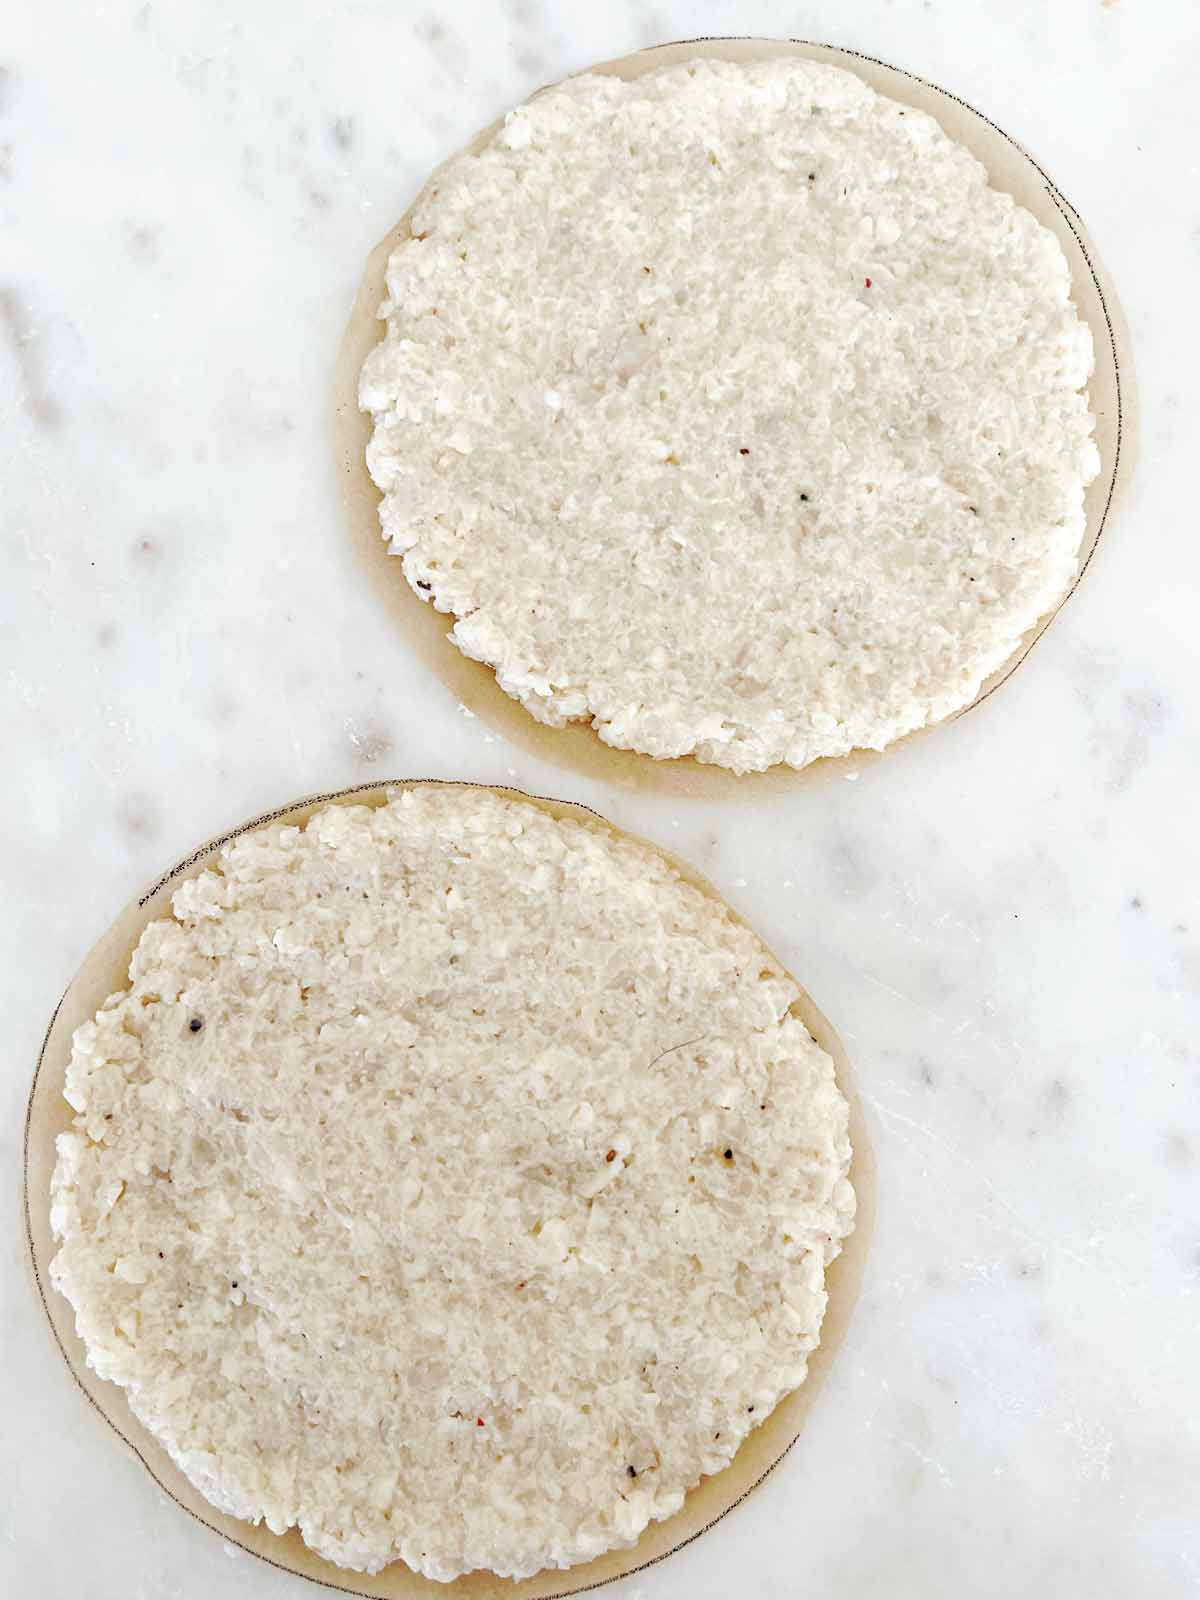
Flatten the dough out to the edge of both parchment circles.
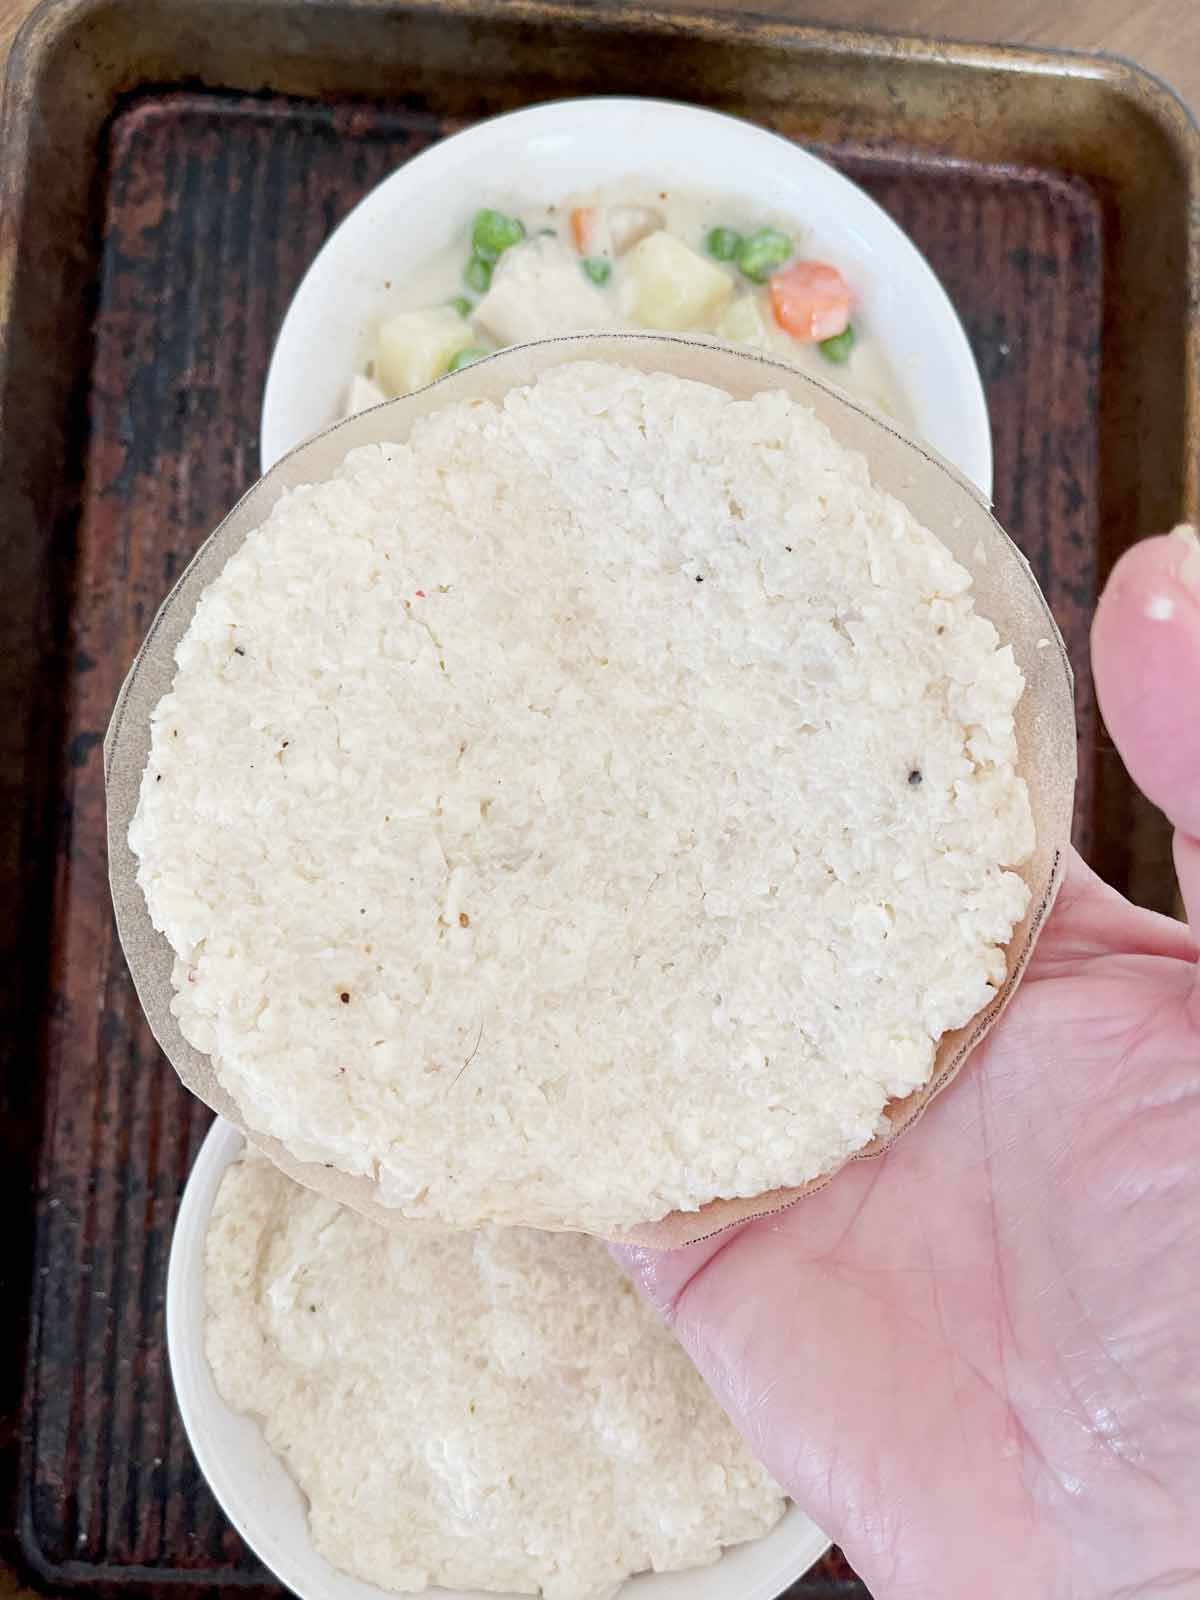
Gently pick up a crust with your and place it on your palm.
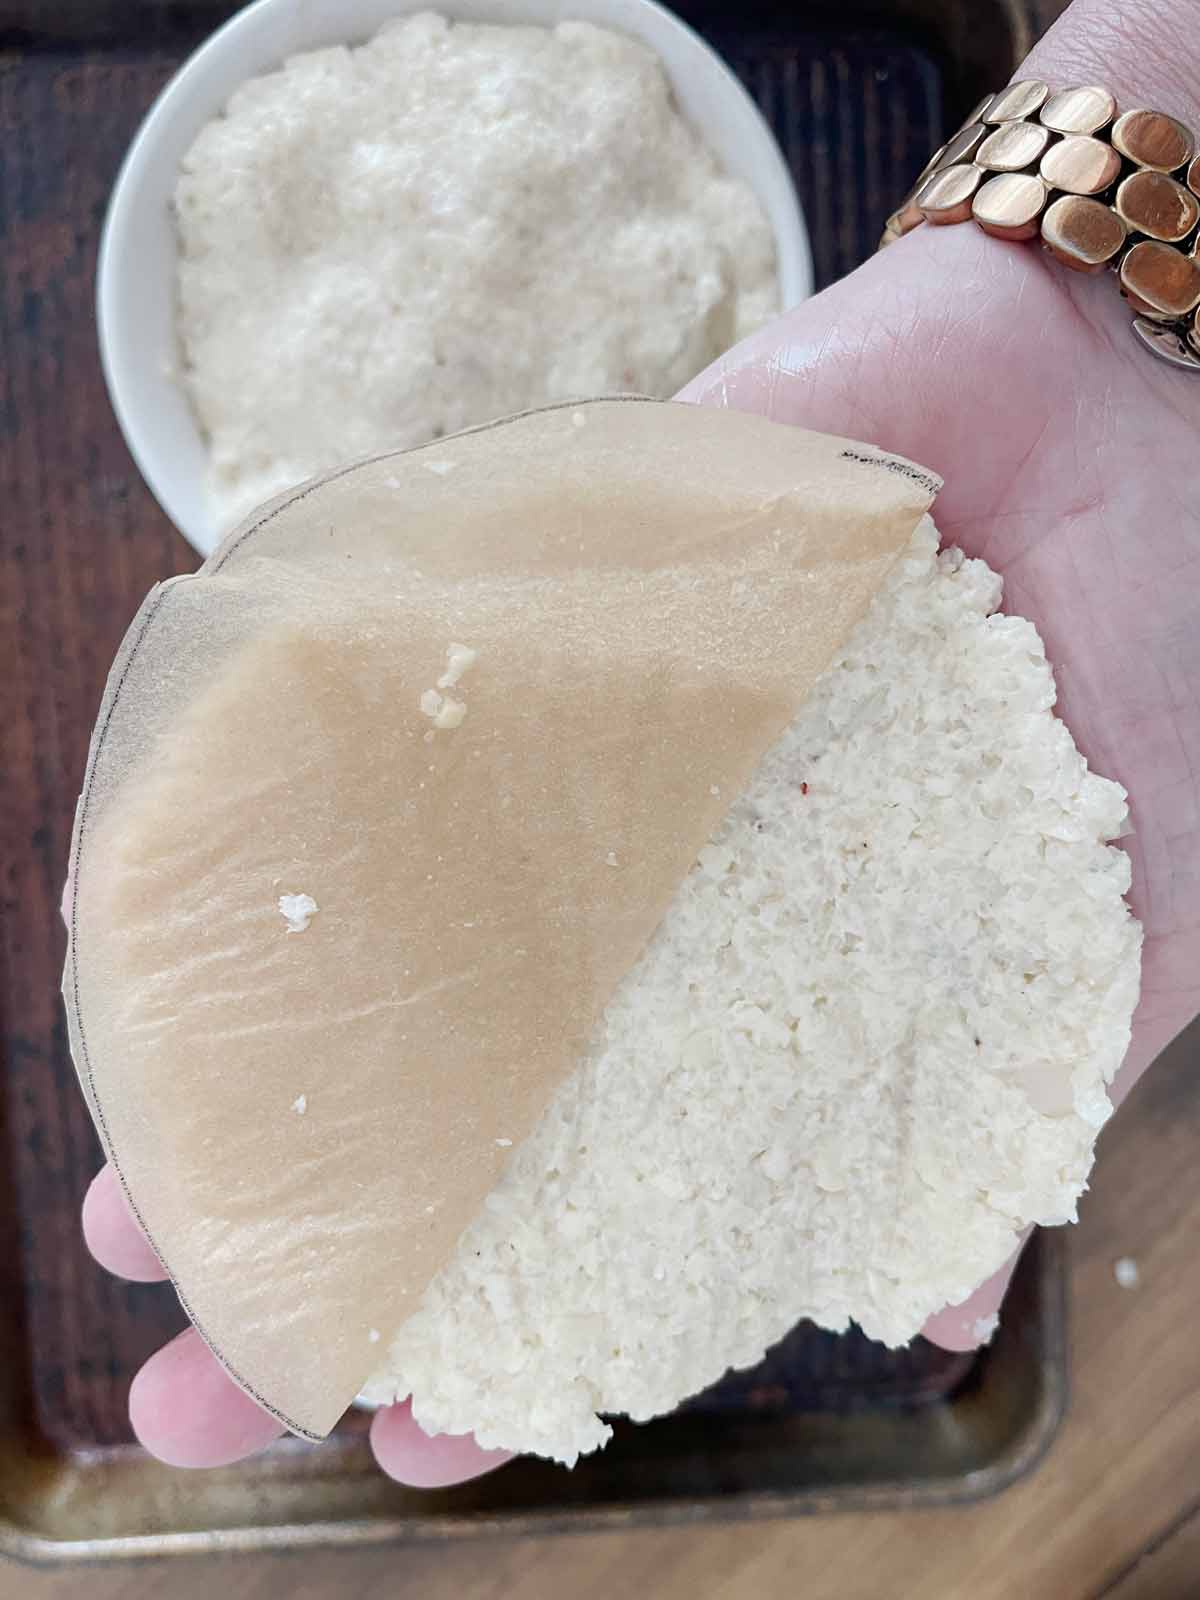
Flip the parchment over in your hand and gently peel the paper off.

Place the discs of crust on top of the filling.
Repeat for the second ramekin, tucking the crust down on edges if needed.
Bake at 400 degrees f until the filling is heated through and bubbly, 35-40 mins.
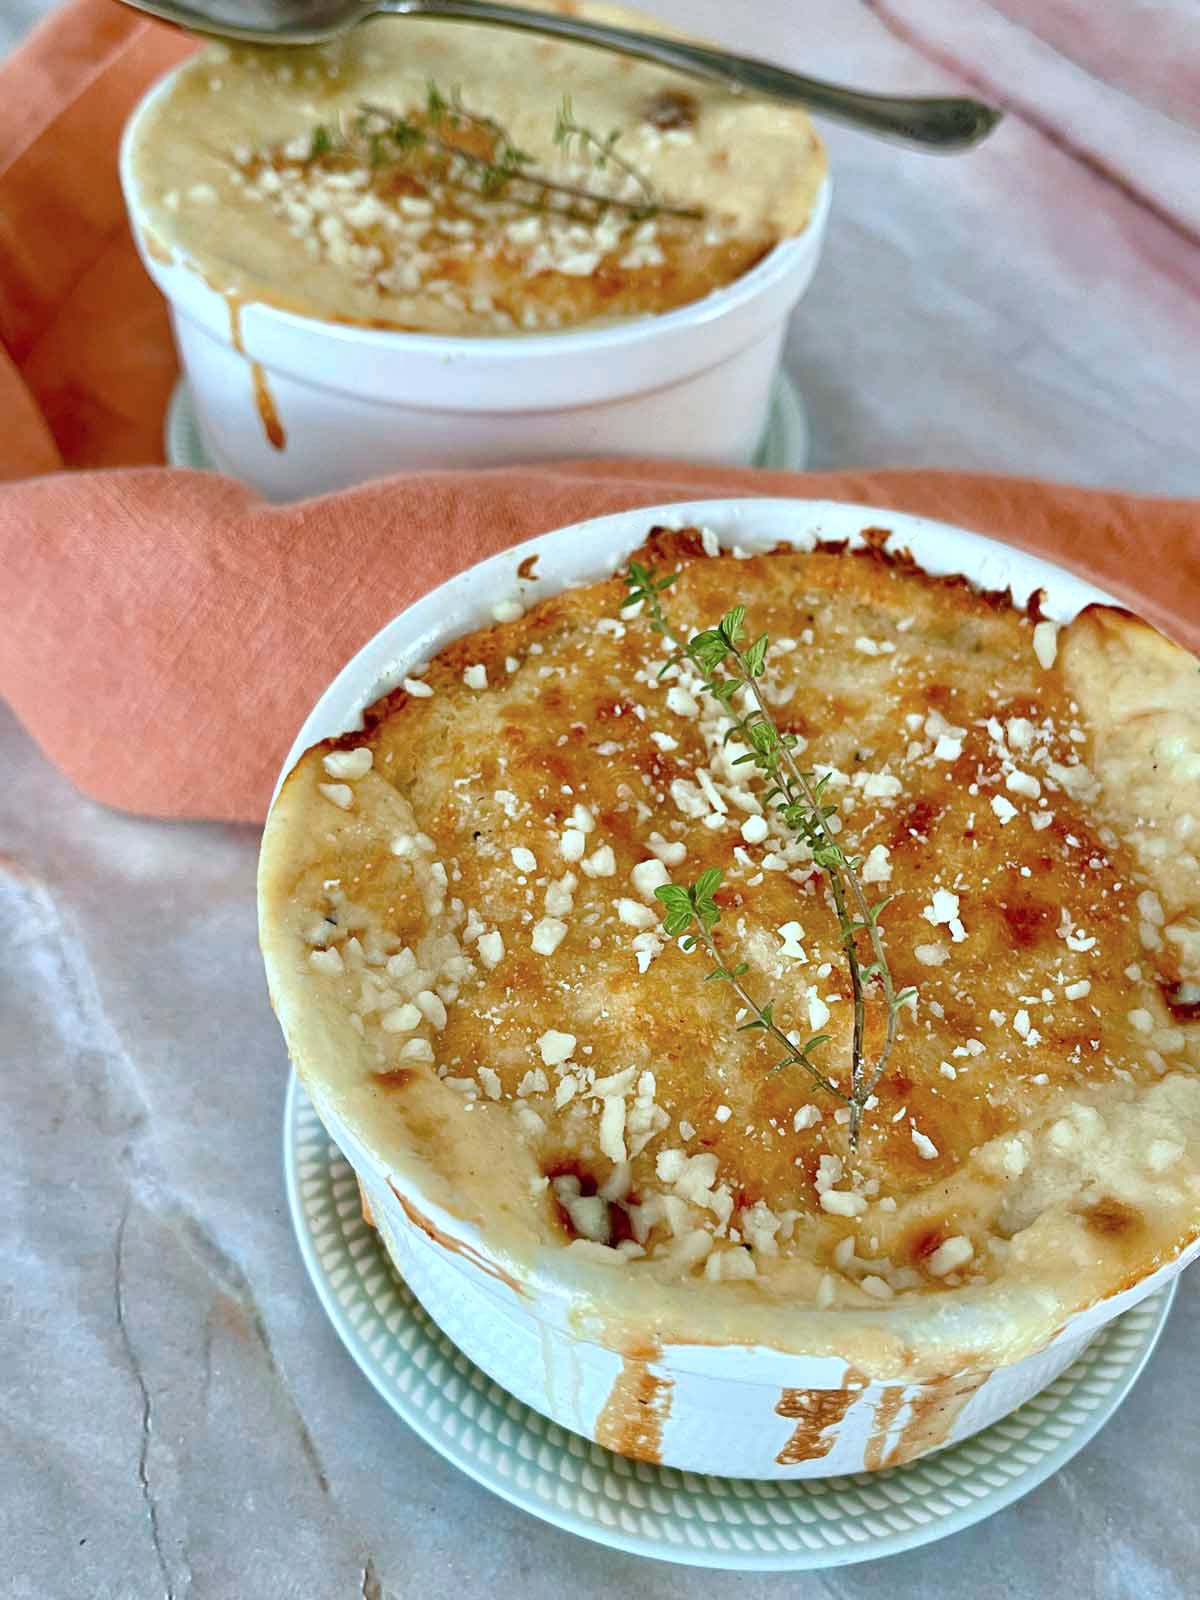
Brush with olive oil. Add thyme and parmesan cheese if desired. Serve hot.
Top Tips
- I used the white meat from a store-bought rotisserie chicken just to save some time. The vegetables were partially cooked in a skillet to cut down on the baking time. I assembled the pot pies ahead of time and refrigerated them for a few hours before baking. It worked perfectly. You could use whatever vegetables you like but I went with the classics, fresh sliced carrot, onion, celery, and potato. The flavor makers in this pot pie are the minced garlic, fresh thyme, and Parmesan cheese in the crust.
- The most labor-intensive part of this dish is preparing the cauliflower crust. Save time by using pre-riced cauliflower in bags in the produce department or in the frozen food case. I chose fresh, steam-in-the-bag cauliflower "rice" from the produce aisle. It cooked in 3 minutes but needs to cool completely after cooking. You have to put the cooked cauliflower in a cotton dishtowel and wring out all the water or your crust will be hard to handle and a soggy mess. Don't skip this step!
- You'll press the crust in the bottom of the ramekins with wet fingers. The top crust is made by shaping a disc of the crust on parchment paper, then flipping it over in your hand and carefully pulling the parchment off. Take your time. This cauliflower crust is delicate. If you mess it up, just press it into a disc again and peel the paper off slower.
Equipment
- Ramekins
- Sieve
- Paper towels
- Non-Stick skillet
- Baking sheet
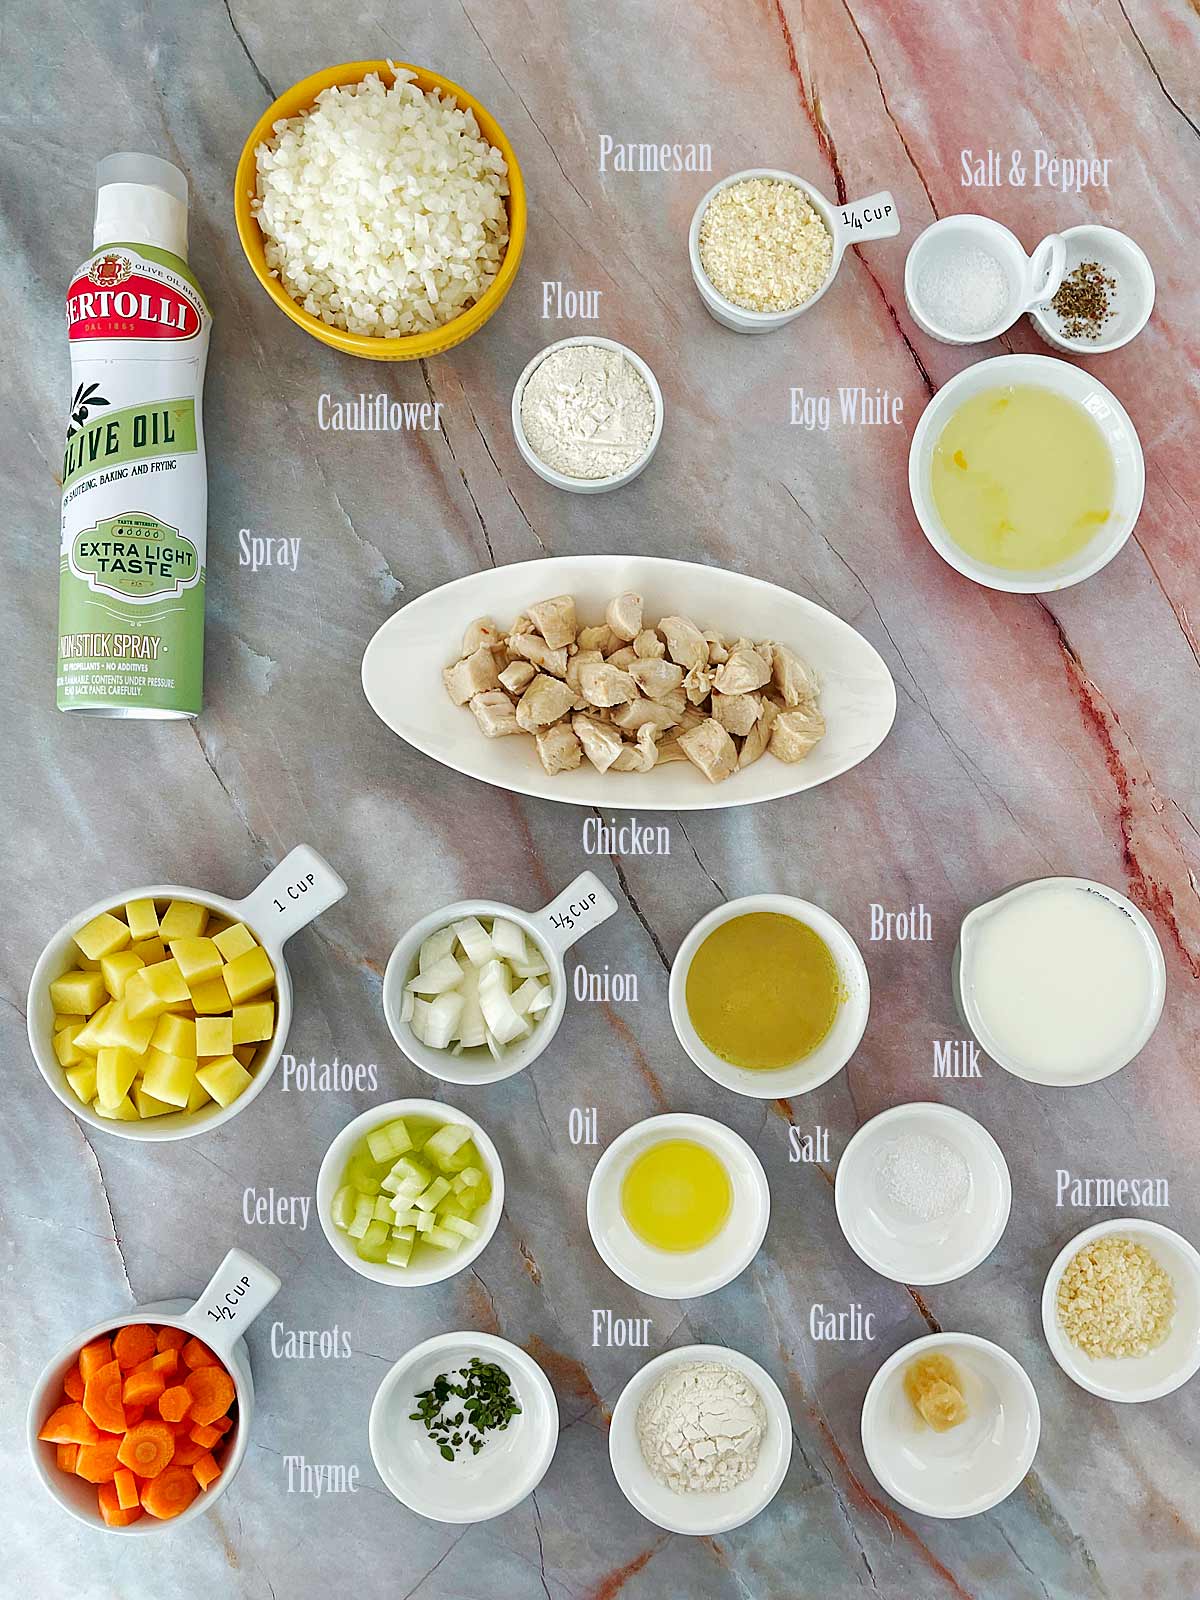
Ingredients
- Non-stick olive oil spray
- 6 ounce pkg cauliflower "rice"
- ¼ cup Parmesan cheese, grated
- 1.5 tablepoons all purpose flour
- ¼ teaspoon salt
- freshly ground black pepper, to taste
- 1 egg white beaten with fork
- ½ cup carrots, sliced ¼" thick
- 1 small stalk celery, thinly sliced
- 1 medium Yukon Gold potato, diced into ½" cubes
- ⅓ cup frozen peas optional, but add at the end just before filling ramekins.
- ¼ cup onion, coarsely chopped
- 1 clove garlic, finely minced or pressed
- ½ cup low-fat milk
- 3 tablespoons low sodium chicken broth
- 1 tablespoon flour, all-purpose
- ½ teaspoon finely chopped fresh thyme or ½ teaspoon dried thyme
- ¼ teaspoon salt
- 1 cup cooked, diced chicken breast
- 1 teaspoons olive oil for garnish
- 2 teaspoons grated Parmesan for garnish
Instructions
- Spray the insides of 2 4.25" diameter, 14 ounce ramekins with olive oil cooking spray and set aside.
- Cook the cauliflower, in the microwave or steamer until soft, 3-5 minutes. Pour the cooked cauliflower into a sieve and let drain and cool completely.
- While the cauliflower is cooling, slice, dice and prepare the vegetables. Spray a non-stick skillet with olive oil spray and add the carrots, onion, potato, and celery. Cook over medium heat for 7-8 minutes, stirring frequently until the vegetables are just fork tender, not mushy! Set aside.
- Preheat the oven to 425 degrees.
- In a medium bowl add the Parmesan, flour, salt, and pepper.
- When the cauliflower is completely cool place it on folded paper towels. Place more folded paper towels over the top and press down with your hands until all the water is expressed.
- Stir the caulifower into the flour mixture, then add the beaten egg. Mix well. Remove and set aside ½ of the crust mixture for the tops. Divide the rest into two portions and press into the bottoms of the ramekins with wet fingers.
- Place the ramekins on a baking sheet. Bake for 10-12 minutes or until the crusts are set and a bit brown on the edges. Remove from oven and set aside.
- In a small bowl add the milk, chicken broth, flour, thyme, garlic, and salt. Stir. Pour into the skillet with the vegetables and heat until the sauce is just bubbly and just begins to thicken. Remove from heat and add the diced chicken. Stir just to mix.
- Divide the filling mixture amongst the ramekins with bottom crusts.
- Divide the reserved crust mixture into two portions. Cut parchment paper into circles the size of the ramekins. Using wet fingers, press the crust onto the parchment paper and shape it into circles the diameter of the ramekins. Flip the parchment over in your hand and gently peel the paper off. Place the discs of crust on top of the filling. (see photos)
- Reduce the oven to 400 degrees and bake until the filling is heated through and bubbly and the crusts are golden brown. Brush with olive oil, sprinkle with the Parmesan cheese, a bit of thyme, and cracked black pepper. Cool just slightly before serving,


Comment